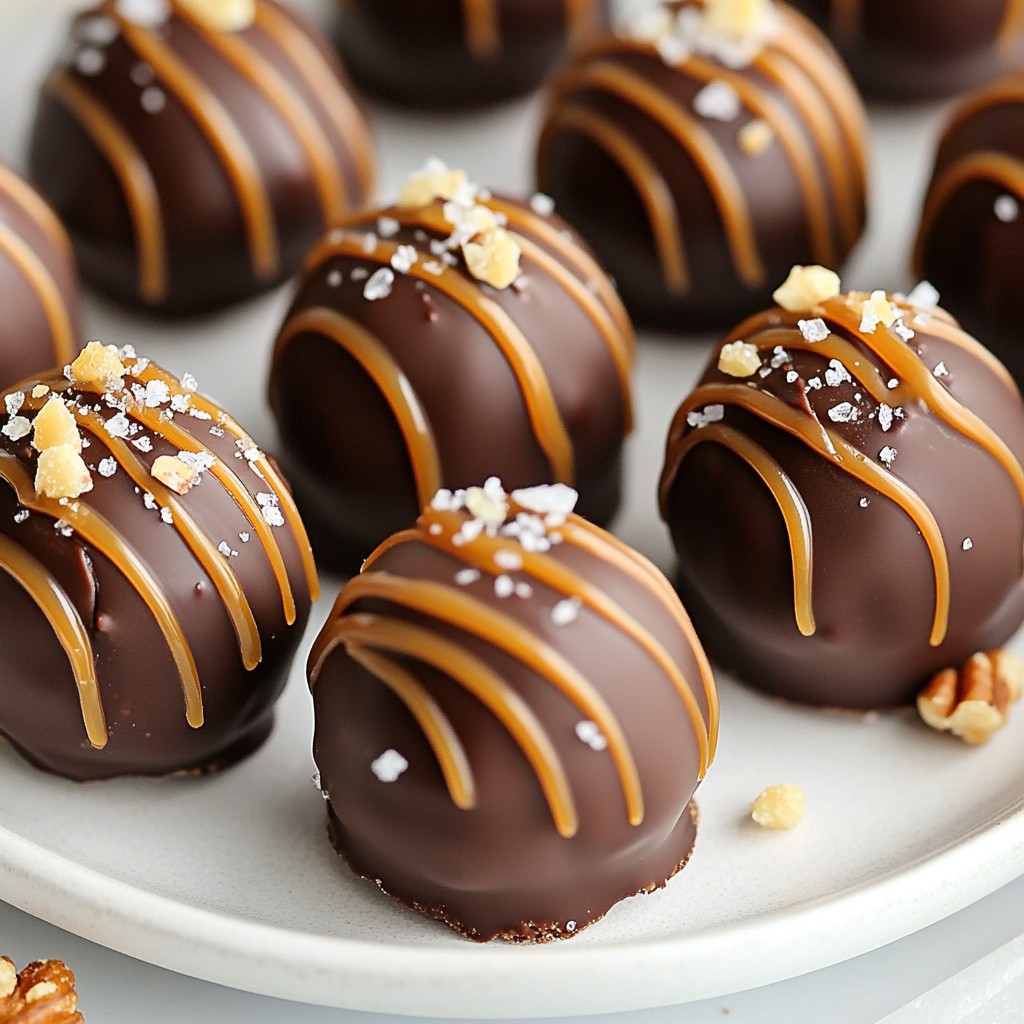
Indulging in salted caramel brownie truffles is a treat you can't resist! These sweet bites combine rich brownie and creamy salted caramel, making them a perfect dessert. With just a few simple steps, you’ll create these delightful truffles. I will guide you through each phase, from gathering the right ingredients to storing your tasty creations. Let’s dive in and elevate your dessert game together!
Why I Love This Recipe
- Decadent Flavor Combination: The rich chocolate brownie paired with the sweet and salty caramel creates an irresistible treat that satisfies every craving.
- Easy to Make: This recipe simplifies the truffle-making process, making it accessible for both novice and experienced bakers.
- Customizable: You can easily adapt these truffles by adding your favorite nuts or using different types of chocolate, allowing for endless variations.
- Perfect for Sharing: These truffles are ideal for parties, gatherings, or as gifts, making them a crowd-pleaser that everyone will love.
Ingredients
List of Required Ingredients
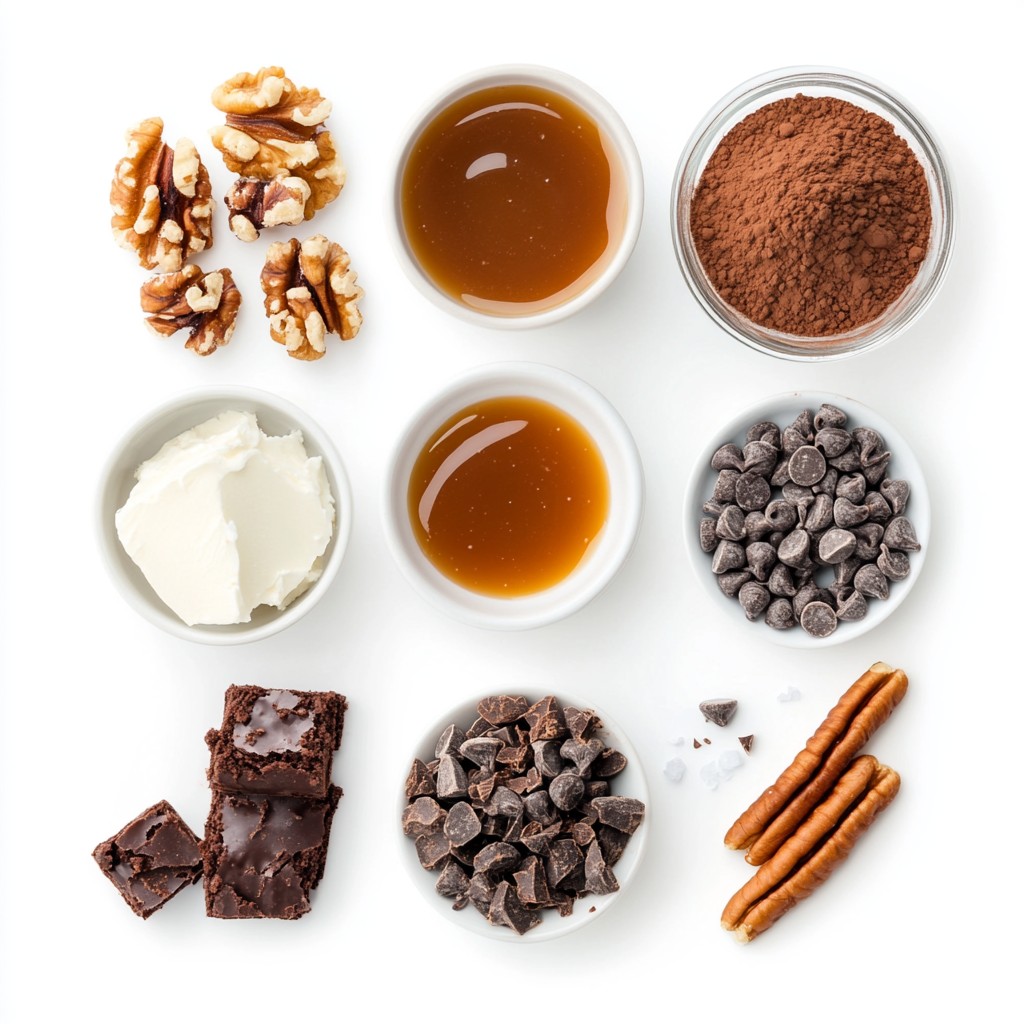
To make Salted Caramel Brownie Truffles, you will need:
- 1 batch of homemade brownies (about 8x8 inches) or a store-bought equivalent
- 1 cup salted caramel sauce (store-bought or homemade)
- 1 cup cream cheese, softened
- 1 cup bittersweet chocolate chips
- 1 tablespoon unsweetened cocoa powder
- Sea salt for sprinkling
- Chopped nuts (like pecans or walnuts) for coating (optional)
Optional Ingredient Variations
You can switch up some ingredients in your truffles for fun. Here are a few ideas:
- Use white chocolate chips instead of bittersweet chocolate for a sweeter taste.
- Swap out the salted caramel for chocolate ganache for a rich twist.
- Try different nut coatings like almonds or hazelnuts for added crunch.
- For a fruity flavor, add a splash of raspberry or orange extract to the brownie mixture.
Recommendations for Best Ingredients
Choosing quality ingredients makes a big difference. Here are my tips:
- Use high-quality cocoa powder for a deeper chocolate flavor.
- Look for a thick, rich salted caramel sauce for the best texture and flavor.
- Choose bittersweet chocolate chips with a cocoa content of 60% or higher for balance.
- If possible, buy fresh nuts and chop them yourself for better taste and crunch.
Step-by-Step Instructions
Preparing the Brownies
First, preheat your oven to 350°F (175°C). If you are making homemade brownies, prepare a batch in an 8x8-inch pan. Follow your favorite recipe or use a box mix. Once baked, let them cool completely. If you use store-bought brownies, skip to the next step. After cooling, crumble the brownies into fine crumbs using your hands. This makes the base for your truffles.
Making the Truffle Mixture
In a mixing bowl, combine the brownie crumbs with 1 cup of softened cream cheese. Add 1/2 cup of salted caramel sauce to the bowl. Mix well until everything is combined. You should have a sticky dough that holds together. Now, roll the mixture into small balls, about 1 inch wide. Place each ball on a parchment-lined baking sheet. Chill these brownie balls in the fridge for about 30 minutes. This helps them firm up before coating.
Coating and Finishing Touches
While the brownie balls chill, melt 1 cup of bittersweet chocolate chips. You can do this in a microwave or over a double boiler. Stir the chocolate until it is smooth and shiny. Once the brownie balls are firm, dip each one into the melted chocolate. Make sure they are fully coated. Use a fork to lift them out and let the excess chocolate drip off. Place the chocolate-covered truffles back on the baking sheet. Drizzle the remaining salted caramel sauce on top. Finish with a sprinkle of sea salt for that delightful contrast. If you want a crunchy coating, roll the truffles in chopped nuts before the chocolate hardens. Chill them again until the chocolate is set. Enjoy your delicious salted caramel brownie truffles!
Tips & Tricks
Best Practices for Rolling Truffles
Rolling truffles can be fun and easy. Here are some key tips to help you. First, use clean hands. This will keep your truffles neat and tidy. Next, keep your brownie mixture cold. Chill it for at least 30 minutes before rolling. This helps the truffles hold their shape. Aim for small balls, about one inch wide. This size is perfect for popping in your mouth. If the mixture sticks to your hands, wet them with a little water. This simple trick makes rolling easier and cleaner.
How to Melt Chocolate Smoothly
Melting chocolate does not have to be hard. To melt chocolate chips smoothly, you can use a microwave or a double boiler. If using a microwave, heat the chocolate in short bursts. Start with 30 seconds, then stir. Repeat until melted. Be careful not to overheat. It can burn quickly. If you prefer a double boiler, fill a pot with water and bring it to a simmer. Place a heat-safe bowl on top, and add the chocolate. Stir gently until melted. This method gives you more control.
Suggestions for Flavor Enhancements
Want to make your truffles even better? Here are some fun ideas. Add a splash of vanilla extract to the brownie mix for extra flavor. You can also try different types of chocolate. Dark chocolate gives a rich taste, while milk chocolate is sweeter. For a fun twist, mix in a pinch of espresso powder for a coffee flavor. If you love nuts, fold in chopped nuts into the brownie mixture. This adds a nice crunch. Finally, sprinkle some sea salt on top before serving. It brings out the sweetness and makes every bite special.
Pro Tips
- Use Room Temperature Cream Cheese: Make sure the cream cheese is at room temperature for easier mixing and a smoother texture in your truffles.
- Chill the Brownies Properly: Let your brownies cool completely before crumbling them, as warm brownies can create a sticky mixture that's difficult to manage.
- Experiment with Coatings: Try different toppings like crushed cookies, coconut flakes, or sprinkles for a fun twist on the classic truffle.
- Store Correctly: Keep your truffles in an airtight container in the refrigerator to maintain their freshness and prevent them from drying out.
Variations
Different Coating Options
You can coat your truffles in different ways to add fun textures. Here are some ideas:
- Chopped Nuts: Roll your truffles in crushed pecans or walnuts for a crunchy bite.
- Cocoa Powder: Dust the truffles with cocoa powder for a rich chocolate flavor.
- Sprinkles: Use colorful sprinkles to make them festive for parties.
- Crushed Cookies: Roll in crushed chocolate cookies for added sweetness and crunch.
Flavor Substitutions
Feel free to mix up the flavors in your truffles. Here are some tasty swaps:
- Nut Butters: Use peanut butter or almond butter instead of cream cheese for a nutty twist.
- Flavored Caramel: Try vanilla or coffee-flavored caramel sauce for an extra kick.
- Chocolate Types: Swap bittersweet chocolate for milk or dark chocolate, depending on your taste.
- Add Spice: A pinch of cinnamon or espresso powder can bring warmth and depth.
Dietary Adjustments (e.g., gluten-free, vegan)
You can make these truffles fit your diet. Here’s how:
- Gluten-Free: Use gluten-free brownies or a gluten-free brownie mix.
- Vegan: Replace cream cheese with a vegan cream cheese or mashed avocado. Use dairy-free chocolate for coating.
- Low Sugar: Use sugar-free brownie mix and a sugar-free caramel sauce for a lower-sugar option.
- Nut-Free: Skip the nuts in the coating if you have allergies and use seeds instead.
These variations let you create truffles that fit your taste and needs. Enjoy experimenting!
Storage Info
How to Store Salted Caramel Brownie Truffles
To keep your salted caramel brownie truffles fresh, store them in an airtight container. Place parchment paper between layers to prevent sticking. The container should be kept in the fridge. This method keeps the truffles cool and helps maintain their shape.
Shelf Life and Best Practices
Salted caramel brownie truffles can last up to one week in the fridge. Make sure to check for any signs of spoilage, like an off smell or unusual texture. For best taste, enjoy them within the first few days. They will taste best when they are fresh and creamy.
Freezing Instructions
You can freeze these truffles for longer storage. To do this, place the truffles on a baking sheet in a single layer. Freeze them for about an hour. Once frozen, transfer them to a freezer-safe bag or container. They will stay good for up to three months. When you want to eat them, simply let them thaw in the fridge before serving.
FAQs
What is the best way to soften cream cheese?
The best way to soften cream cheese is to leave it at room temperature. It takes about 30 minutes to an hour. You can also cut it into small pieces. This speeds up the softening process. If you need it faster, you can microwave it. Heat on low for about 10 seconds. Be careful not to melt it!
Can I use store-bought brownies for this recipe?
Yes, you can use store-bought brownies. They save time and still taste great. Just make sure they are fresh. Crumble them into fine pieces as you would homemade brownies. This keeps the texture just right for your truffles.
How long do these truffles take to set?
These truffles take about 30 minutes to set in the fridge. This helps the chocolate harden and keeps the truffles firm. After you coat them in chocolate, place them back in the fridge. Let them chill until the chocolate is completely hard. Enjoy them after they set!
In this post, I covered how to make salted caramel brownie truffles. I shared the key ingredients, step-by-step instructions, and handy tips for perfecting your truffles. We explored variations for flavor and dietary needs, plus storage methods.
Making these treats can be fun and rewarding. Enjoy the process and share with friends. It's a simple way to impress anyone with your skills!