Skip to content
DisclaimerTerms Of UseGDPR PolicyCookie Policy

Emmas Dish

  • Home
  • Drinks
  • Appetizers
  • Dinner
  • Dessert
  • About
  • Contact
  • Privacy Policy
DisclaimerTerms Of UseGDPR PolicyCookie Policy

NO-ING-IMG

- 1 cucumber, peeled and chopped - 2 cups kale leaves, stems removed - 1 green apple, cored and chopped - 1 lemon, juiced - 1 tablespoon fresh ginger, grated - 2 cups coconut water - A pinch of sea salt - Cucumber: This green veggie helps keep you hydrated and adds vitamins. - Kale: Kale is rich in antioxidants, which help fight free radicals. - Green Apple: It provides fiber and natural sweetness to your juice. - Lemon: This fruit gives vitamin C and helps detox your body. - Ginger: Ginger has anti-inflammatory properties that can soothe your gut. - Coconut Water: It helps balance electrolytes and hydrates you. Using these fresh ingredients, you create a simple yet powerful drink. Each one adds its own health benefits that work together. The cucumber and coconut water hydrate you, while kale and ginger boost your immune system. This juice not only tastes good but also makes you feel great! {{ingredient_image_1}} - How to peel and chop a cucumber: Start by washing the cucumber. Use a sharp peeler to remove the skin. Cut the cucumber in half lengthwise, then slice it into small pieces. - Cores and chopping a green apple: Wash the apple first. Cut it into quarters, then remove the core. Chop the apple into small chunks. - Juicing a lemon effectively: Roll the lemon on the counter to break down the pulp. Cut it in half and use a juicer to squeeze out the juice. - How to assemble the ingredients in the blender: Add the chopped cucumber, kale leaves, green apple, lemon juice, grated ginger, coconut water, and a pinch of sea salt to the blender. - Recommended blender settings for smoothies/juices: Set your blender to high speed. Blend until the mixture is smooth and no chunks remain. - Techniques for straining juice for smoothness: Use a fine mesh sieve or cheesecloth to strain the juice. Pour the juice into the sieve and press gently to extract all the liquid. - Suggested serving methods over ice: Pour the strained juice into glasses filled with ice. This keeps the juice cold and refreshing. Enjoy right away! To get the right thickness, use coconut water. This adds flavor and hydration. If your juice is too thick, just add more coconut water. It blends well and keeps it light. Now, consider using ice or chilled ingredients. Ice makes the juice very cold and refreshing. However, chilled ingredients also work well. They keep your drink cool without watering it down. If you want a zesty kick, add more lemon juice. This brightens the flavor and boosts freshness. You can also add a pinch of salt. It enhances the taste and balances the sweetness. Feel free to mix in other herbs or greens. Fresh mint or parsley can add extra flavor. They also bring a lovely scent to your juice. For a beautiful touch, garnish with fresh mint. It adds color and a nice aroma. You can also use cucumber slices. Place them on the rim of your glass for a fun look. Choosing the right glassware is key. Use tall glasses for a classic feel. Clear glasses show off the juice’s vibrant color, making it more inviting. Pro Tips Use Fresh Ingredients: Always opt for fresh, organic produce to enhance the flavor and nutritional value of your juice. Adjust Sweetness: If you prefer a sweeter juice, consider adding an extra green apple or a small splash of honey to balance the flavors. Chill Before Serving: For a refreshing experience, chill your juice in the refrigerator for 30 minutes before serving or serve it over ice. Experiment with Greens: Feel free to substitute kale with other leafy greens like spinach or swiss chard for a different taste and nutritional profile. {{image_2}} You can switch things up by adding spinach or parsley. Both greens boost health. Spinach is rich in iron, while parsley adds a fresh taste. You can also try different fruits. Pears add smoothness, and kiwis bring a tart twist. Each of these choices can create a unique flavor profile. You can choose to juice or blend your ingredients. Juicing gives a smooth drink, while blending keeps more fiber. If you prefer the cold-pressed method, it keeps more nutrients. Cold-pressed juice can have a fresher taste, too. Each method has its perks, so find what you enjoy most. Using seasonal fruits and vegetables makes your juice fresh. In summer, add watermelon for a hydrating boost. In winter, try oranges for a vitamin C kick. Seasonal choices not only taste better but also support local farmers. Always look for what’s fresh at your local market. Homemade juice stays fresh for about 2 to 3 days in the fridge. Keep it in a cool spot. Make sure to use a clean container. If you want to save juice for later, freezing is a great option. Pour juice into ice cube trays. Once frozen, transfer the cubes to a freezer bag. This way, you can use them in smoothies or other drinks. To store juice, glass containers work best. They do not absorb flavors or odors. You can also use BPA-free plastic bottles. Choose containers with airtight seals to keep your juice fresh. An airtight seal helps keep out air and light, which can spoil the juice. This way, your Simple Green Detox Juice stays tasty and healthy for longer! The best time to drink detox juice is in the morning. It helps kickstart your day. Drinking it on an empty stomach can enhance digestion and absorption. You can also enjoy it as a refreshing snack or a post-workout drink. Yes, you can substitute coconut water with plain water or green tea. These options will still keep the juice hydrating. If you want a sweeter taste, consider using apple juice. However, coconut water adds electrolytes, which is beneficial. You can enjoy detox juices daily if you want. Many people drink them several times a week. Just listen to your body. If you feel great, keep sipping! Balance is key, so pair these juices with whole foods. This juice is mostly suitable for most people. However, if you have allergies to any ingredients, avoid those. Pregnant women should consult a doctor before trying new juices. Always check with your healthcare provider if unsure. This blog covered the steps to make a Simple Green Detox Juice. We explored the key ingredients and their health benefits. You learned how to prepare, blend, and serve the juice for the best taste. I also shared tips for adjusting flavors and achieving the right consistency. Remember, juice is a great way to hydrate and boost your health. Try different fruits and veggies to keep it fresh. Enjoy your juice and the benefits it brings!

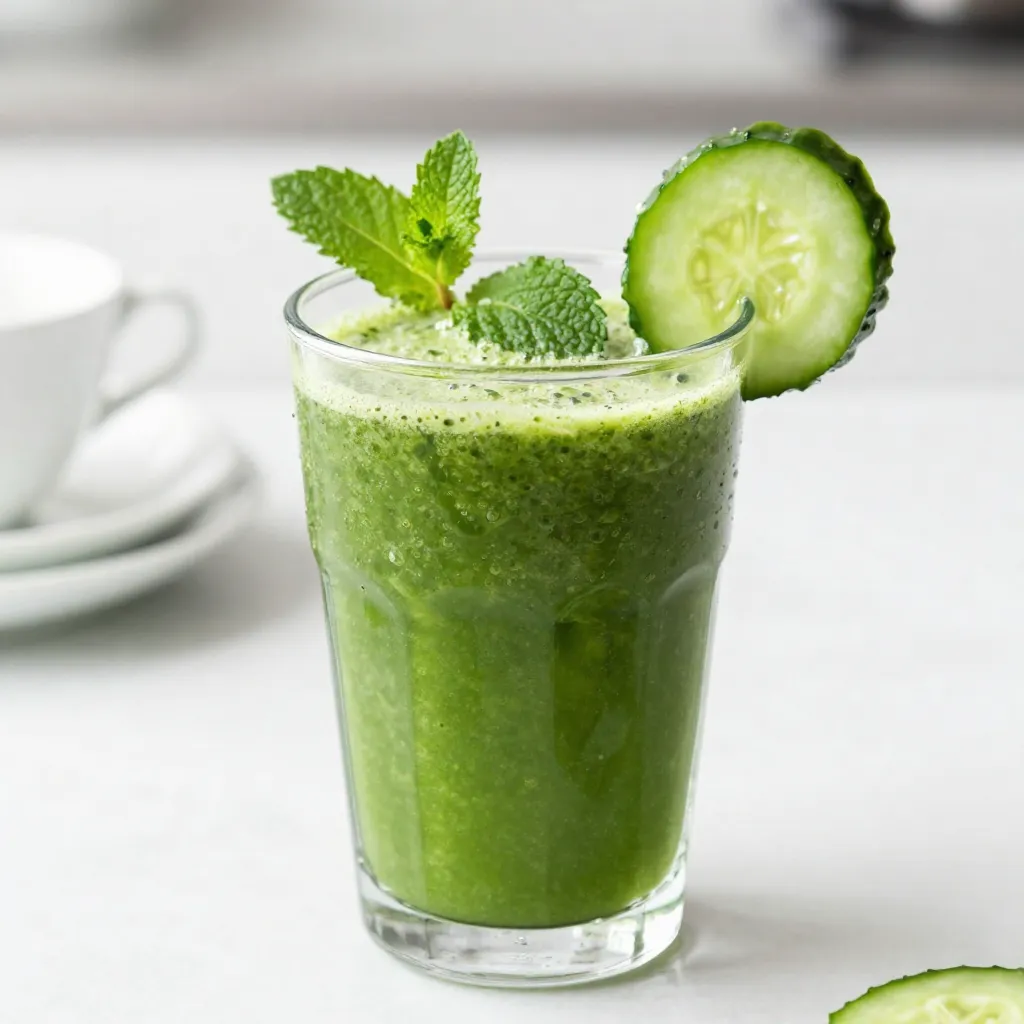
Simple Green Detox Juice Refreshing and Healthy Drink

If you’re looking for a refreshing drink that cleanses your body, you’re in the right place! My Simple Green Detox

Asparagus is a green veggie that is both tasty and healthy. For this recipe, choose 1 pound of fresh asparagus. Look for bright green spears. They should feel firm and have tightly closed tips. Trim the bottoms to about 2 inches. This removes the tough ends for a better bite. This dish shines with just a few key flavors. You need: - 3 tablespoons olive oil - 3 cloves garlic, minced - Zest of 1 lemon - Juice of 1 lemon - Salt and pepper to taste The olive oil adds richness. Garlic gives it a nice kick. Lemon zest and juice brighten the dish. Salt and pepper enhance all the flavors. For a little extra flair, add these options: - 1 teaspoon red pepper flakes (for some heat) - 2 tablespoons grated Parmesan cheese (for creaminess) - Fresh parsley, chopped (for a fresh finish) These add-ins can change the dish's taste. Adjust them to fit your mood or meal. Enjoy making your lemon garlic asparagus special! {{ingredient_image_1}} First, set your oven to 400°F (200°C). This high heat helps the asparagus roast well. A hot oven makes the asparagus tender and gives it a nice crisp. In a big bowl, add the trimmed asparagus. Pour in 3 tablespoons of olive oil. Add 3 minced garlic cloves, the zest of one lemon, and the juice of that lemon too. If you want a kick, toss in 1 teaspoon of red pepper flakes. Mix it all up well. Make sure the asparagus gets covered evenly. Now, season with salt and pepper to your taste. Give it another gentle toss to ensure everything is mixed well. This mixture is what makes the asparagus shine! Spread the asparagus mixture across a baking sheet. Make sure it’s in a single layer. This step helps it roast evenly. Place the baking sheet in your preheated oven. Roast for about 12 to 15 minutes. Check it until the asparagus is tender and slightly crispy. Once it's done, take it out of the oven. If you like cheese, sprinkle 2 tablespoons of grated Parmesan while it’s still hot. This adds a rich flavor. Finally, sprinkle some chopped fresh parsley for a bright touch before serving. Enjoy your delicious lemon garlic asparagus! To get the best tender asparagus, start with fresh stalks. Look for bright green color and firm texture. Trim the ends about one inch to remove the tough part. This helps them cook evenly. Roasting at 400°F (200°C) creates a great balance of crispiness and tenderness. Keep an eye on them. They should be done in 12-15 minutes. You want them to be soft but not mushy. Lemon and garlic bring out the best in asparagus. Mince the garlic finely for a strong taste. The zest adds a bright flavor without bitterness. Feel free to add red pepper flakes for a bit of heat. Just a teaspoon is enough to wake up the dish. A sprinkle of salt and pepper at the end helps balance the flavors too. If you want a cheesy touch, add Parmesan while hot. It melts into the asparagus beautifully. Serving is key to making a dish shine. Use a pretty platter for the asparagus. Drizzle any leftover garlic-lemon oil from the pan on top. This adds flavor and looks nice. A lemon wedge on the side gives a fresh pop of color. For a finishing touch, sprinkle chopped parsley over the top. This not only looks great but also adds fresh flavor. Pro Tips Choose Fresh Asparagus: Select bright green asparagus with firm stalks and closed tips for the best flavor and texture. Adjust Roasting Time: Thinner asparagus spears will cook faster, so keep an eye on them to avoid overcooking. Experiment with Seasonings: Feel free to customize the garlic and lemon with herbs like thyme or rosemary for a different flavor profile. Serve Immediately: Asparagus is best enjoyed fresh out of the oven while it's still warm and crisp. {{image_2}} You can add Parmesan cheese to your lemon garlic asparagus for extra flavor. When the asparagus is hot from the oven, sprinkle grated Parmesan on top. The heat will melt the cheese slightly, creating a creamy texture. This adds a rich taste that pairs well with the bright lemon and garlic. If you enjoy heat, add red pepper flakes to the mix. This will give your asparagus a spicy kick. Start with a teaspoon of red pepper flakes, and adjust to your liking. The spice balances the acidity of the lemon and the warmth of the garlic. Lemon garlic asparagus pairs well with many dishes. Serve it alongside grilled chicken or fish for a balanced meal. You can also enjoy it with quinoa or brown rice for a vegetarian option. For a simple lunch, toss it in a salad with greens and chickpeas. This dish is versatile and complements various flavors. To keep your lemon garlic asparagus fresh, store it in an airtight container. This keeps moisture in and prevents the asparagus from drying out. If you have leftover garlic-lemon oil, save that too. It adds great flavor when you reheat the dish. Reheat your asparagus in the oven or on the stovetop. For the oven, set it to 350°F (175°C). Place the asparagus on a baking sheet and warm for about 10 minutes. On the stovetop, heat a skillet over medium heat. Add a splash of olive oil and sauté for 3-5 minutes until warmed through. Lemon garlic asparagus stays good for up to 3 days in the fridge. After that, it may lose its crispness and flavor. Always check for any signs of spoilage before eating leftovers. Yes, you can use frozen asparagus. However, fresh asparagus gives the best taste and crunch. If you use frozen, thaw it first. Pat it dry to remove extra water. This helps get a nice roast. To trim asparagus, hold the stalk in your hands. Bend it gently until it snaps. It will break where the tough part ends. You can also cut off about an inch from the bottom with a knife. This keeps your asparagus tender. Asparagus is done when it is bright green and tender. You can test it with a fork. If it goes in easily, it is ready. The tips should be slightly crispy, not mushy. This means you’ve cooked it just right. This article covered everything you need to know about cooking asparagus. We explored fresh asparagus details and essential seasonings. I shared step-by-step instructions and useful tips for perfecting your dish. You also learned fun variations and the best ways to store your leftovers. Remember, asparagus is flexible, so feel free to experiment. Whether you roast it or try a new flavor, enjoy each bite. Happy cooking!

Lemon Garlic Asparagus Flavorful and Simple Recipe

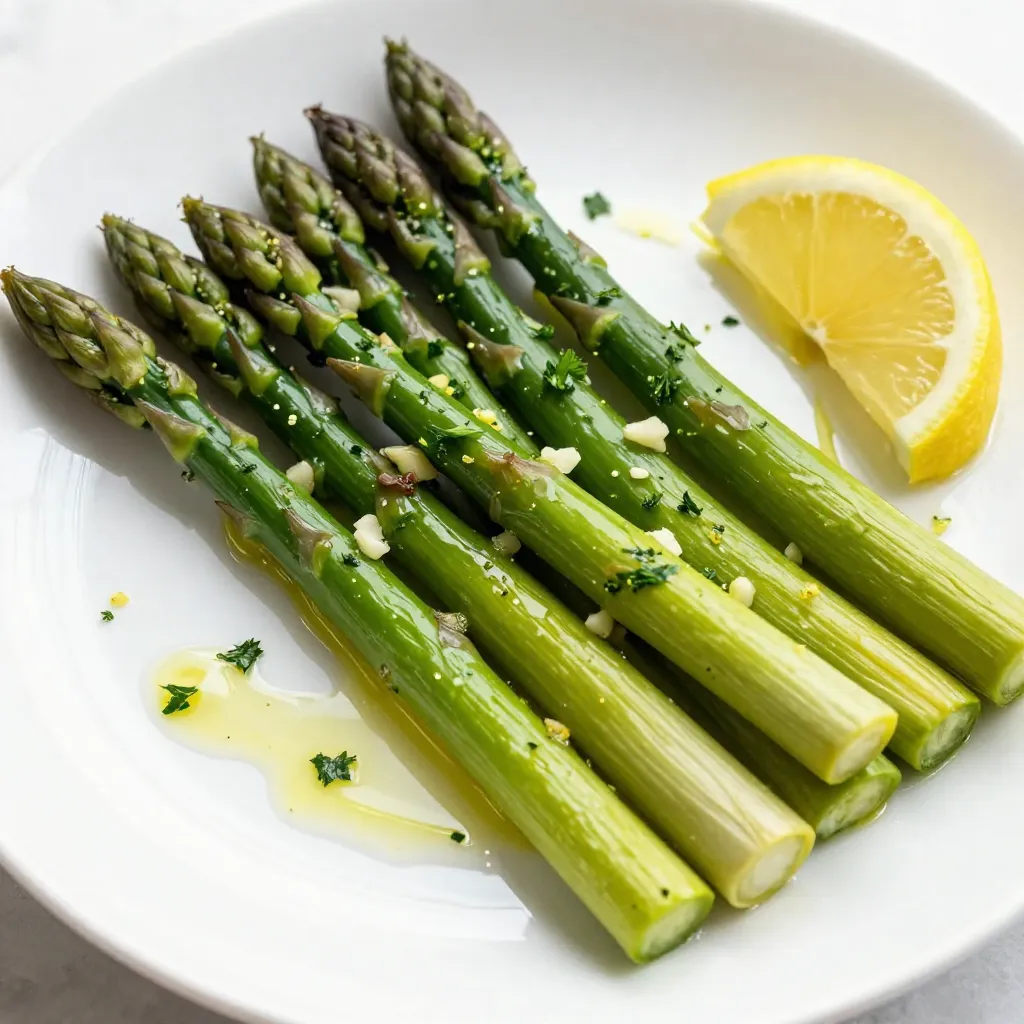
Looking to add a burst of flavor to your meals? This Lemon Garlic Asparagus recipe is your answer! It’s simple,

- Chicken: I use 1 lb of boneless, skinless chicken breasts. Dicing the chicken helps it cook quickly. Chicken is a great source of protein and keeps you full. - Vegetables: I include onion, garlic, ginger, carrot, zucchini, and baby spinach. They add color and nutrients. Each vegetable brings its own flavor and health benefits. - Spices: The star here is 2 teaspoons of ground turmeric. It gives the soup its warm color and health perks. I also use cumin and coriander for depth. - Olive oil: A tablespoon of olive oil is perfect for sautéing. It adds healthy fats and enhances the flavors of the soup. - Coconut milk: One can of coconut milk provides creaminess. It balances the spices and adds a touch of sweetness. - Chicken broth: Three cups of chicken broth serve as the base. It adds depth and richness to the soup. - Fresh cilantro: A sprinkle of fresh cilantro adds brightness. It brings a fresh flavor that lifts the soup. - Lime juice: Squeezing lime juice just before serving adds a tangy kick. It brightens the soup and enhances all the flavors. {{ingredient_image_1}} First, you need to prepare the chicken and vegetables. Start by dicing 1 pound of boneless, skinless chicken breasts into small pieces. This helps the chicken cook evenly and quickly. Next, chop 1 medium onion into small bits. Then, mince 3 cloves of garlic and grate a tablespoon of fresh ginger. These aromatics will add great flavor to your soup. Now, heat 1 tablespoon of olive oil in a large pot over medium heat. Add the chopped onion and sauté it until it’s soft and translucent, which takes about 5 minutes. After that, stir in the minced garlic and grated ginger. Cook them for just 1 minute until they smell great. Next, add the diced chicken to the pot. Sprinkle in salt, pepper, 2 teaspoons of ground turmeric, 1 teaspoon of ground cumin, and 1 teaspoon of ground coriander. Cook the chicken until it turns white and is no longer pink, about 5-7 minutes. Then, pour in 3 cups of chicken broth and 1 can of coconut milk. Stir well, and bring the mixture to a gentle simmer. Once your soup is simmering, it’s time to add the vegetables. Dice 1 medium carrot and 1 medium zucchini, then toss them into the pot. Allow the soup to simmer for 10-15 minutes until the veggies are soft. Finally, stir in 1 cup of baby spinach and cook for another 2-3 minutes until it’s wilted. Remove the pot from heat, and squeeze the juice of 1 lime into the soup. You can adjust the seasoning to your taste at this point. Your warm, turmeric chicken soup is ready to serve! To make sure the chicken stays tender, cook it just until it is no longer pink. This usually takes about 5-7 minutes. If you overcook it, the chicken can become dry. For the best way to sauté aromatics, heat your olive oil over medium heat. Add the chopped onion first and let it cook until it turns translucent. This should take about 5 minutes. Then, add minced garlic and grated ginger, and cook for one more minute. This will build a great flavor base for your soup. To boost the flavor, consider adding more spices. You might try smoked paprika or cayenne pepper for some heat. Both can add depth and warmth to the soup. When it comes to herbs, fresh cilantro is a great choice. You can also use fresh basil or parsley for a different twist. Adding herbs right at the end of cooking enhances their fresh taste. For serving, ladle the soup into bowls and top with fresh cilantro. A squeeze of lime juice just before serving brightens the dish. For plating, consider using a shallow bowl. This gives your soup an elegant look. You can also drizzle a little coconut milk on top for a beautiful finish. Pro Tips Fresh Ingredients: Always use fresh spices and herbs for the best flavor. Fresh ginger and cilantro enhance the soup's aroma and taste. Customize Your Veggies: Feel free to add or substitute vegetables according to your preference. Bell peppers, green beans, or mushrooms also work well in this soup. Let It Simmer: Allow the soup to simmer a bit longer for deeper flavors. The longer it simmers, the more the spices will infuse into the chicken and vegetables. Perfect Serving: Serve the soup with a side of crusty bread or over a bed of rice for a complete meal. It’s also delicious topped with avocado slices. {{image_2}} You can switch out chicken for other proteins. Tofu works well for a vegetarian option. It absorbs flavors nicely and adds protein. You can also try shrimp or fish for a seafood twist. For veggies, think about adding bell peppers or mushrooms. They add great texture and taste. Other options include sweet potatoes or kale. You can mix and match to find what you love most. If you need a gluten-free option, this soup is easy to modify. Just use gluten-free broth. Most coconut milk brands are gluten-free too. Always check the label to be sure. For a vegan version, swap chicken broth for vegetable broth. Leave out the chicken and add more veggies or beans. This still gives you a hearty soup that feels filling and warm. You can give this soup a Thai twist by adding lime leaves and Thai basil. These bring in bright, fresh flavors. A splash of fish sauce can also enhance the taste. For Indian influences, consider adding diced tomatoes and peas. You might want to add garam masala instead of cumin. This gives the soup a warm, spicy kick that’s simply delightful. To store your leftover turmeric chicken soup, let it cool first. Once it’s cool, pour the soup into an airtight container. Seal the lid tightly. Place the container in the fridge. Your soup will stay fresh for about 3 to 4 days. If you're unsure, give it a sniff before eating. If it smells off, toss it out. Freezing soup is easy and great for meal prep. First, let the soup cool completely. Next, pour it into freezer-safe containers or bags. Leave some space at the top since the soup will expand as it freezes. Label each container with the date. You can freeze the soup for up to 3 months. When you're ready to eat, just take it out and let it thaw. Reheating soup is simple. You can use the stove or microwave. For the stove, pour the soup into a pot. Heat over medium until it’s hot, stirring often. For the microwave, place the soup in a microwave-safe bowl. Heat in 1-minute intervals, stirring in between. Make sure it’s steaming hot before you serve. Enjoy your warm, nourishing bowl! Turmeric brings many health benefits to this soup. It contains curcumin, which has strong anti-inflammatory properties. This can help reduce pain and swelling in the body. Turmeric also boosts your immune system. It has antioxidants that fight free radicals and support overall health. Plus, it can aid digestion and promote heart health. Adding turmeric to your soup means you get flavor and nutrition in every bowl. Yes, you can use different types of chicken. Dark meat, like thighs or drumsticks, works well too. Dark meat tends to be juicier and adds more flavor. If you choose dark meat, adjust the cooking time. It may take a bit longer to cook through. Always ensure the chicken reaches a safe temperature of 165°F (75°C) for safe eating. Absolutely! This soup is gluten-free. The ingredients used, like chicken, vegetables, and spices, do not contain gluten. Just be careful with the chicken broth. Some brands may add gluten-containing ingredients. Always check labels to ensure they are gluten-free. This makes the soup a great option for those with gluten sensitivity. This soup can last in the fridge for about 3 to 4 days. Store it in an airtight container to keep it fresh. When reheating, make sure it reaches a safe temperature of 165°F (75°C). If you want to keep it longer, consider freezing it. Frozen soup can last for about 2 to 3 months in the freezer. This blog post covered how to make a tasty chicken soup. We explored main ingredients like chicken and vegetables, and key pantry staples. You learned the step-by-step cooking process, along with useful tips for flavor and presentation. We also looked at variations and ways to store your soup. In making this soup, focus on fresh ingredients and enjoy the process. Take your time to experiment with flavors and find what you love. Happy cooking!

Turmeric Chicken Soup Nutritious Comfort in a Bowl

Are you craving a warm bowl of comfort? Look no further! My Turmeric Chicken Soup offers a cozy blend of

To make this tasty dish, you need a few key items: - 1 lb (450g) boneless, skinless chicken thighs, cut into bite-sized pieces - 1/2 cup all-purpose flour - 1/2 cup cornstarch - 1 teaspoon baking powder - 1 teaspoon salt - 1/2 teaspoon black pepper - 1 teaspoon garlic powder - 1 teaspoon onion powder - 2 eggs, beaten - 1/4 cup orange juice - 1/4 cup honey - Zest of 1 orange - 1 tablespoon soy sauce - 2 tablespoons sesame oil These ingredients come together to create a dish that is both crispy and flavorful. You will also need some common pantry staples for this recipe: - Salt - Black pepper - Baking powder - Garlic powder - Onion powder - Soy sauce These ingredients help enhance the taste of your orange chicken. To make your dish look even better, consider adding these garnishes: - 2 green onions, sliced - Sesame seeds These add a nice crunch and extra flavor. Feel free to use them for a lovely presentation! Start by cutting 1 pound of boneless, skinless chicken thighs into small pieces. This size helps the chicken cook evenly. Place the chicken in a large bowl. In another bowl, mix these dry ingredients: - 1/2 cup all-purpose flour - 1/2 cup cornstarch - 1 teaspoon baking powder - 1 teaspoon salt - 1/2 teaspoon black pepper - 1 teaspoon garlic powder - 1 teaspoon onion powder In a separate bowl, beat 2 eggs. Then add: - 1/4 cup orange juice - 1/4 cup honey - Zest of 1 orange - 1 tablespoon soy sauce - 2 tablespoons sesame oil Mix well until combined. Dip each chicken piece into the egg mixture, letting the extra drip off. Next, roll the chicken in the flour mix. Make sure each piece is fully coated. Preheat your air fryer to 400°F (200°C) for about 5 minutes. Then, place the coated chicken in a single layer in the basket. Cook for 10 to 12 minutes. Shake the basket halfway through cooking. This helps the chicken get crispy and golden brown. While the chicken cooks, prepare the orange sauce. In a small saucepan, mix: - 1/4 cup orange juice - 1/4 cup honey - 1 tablespoon soy sauce - 2 tablespoons sesame oil Cook over medium heat until the sauce thickens slightly, about 3 to 4 minutes. Once the chicken is done, toss it in a bowl with the orange sauce. Serve right away, topped with sliced green onions and sesame seeds. Enjoy your meal! For extra crispiness, use cornstarch in your coating mix. It keeps the chicken light and crunchy. Make sure to shake off any excess batter before cooking. This helps the hot air circulate. Another tip is to spray a light coat of oil on the chicken. This will help it brown evenly in the air fryer. One common mistake is overcrowding the air fryer basket. This can lead to uneven cooking. Always arrange the chicken in a single layer. Another mistake is not preheating the air fryer. Preheating helps get that crispy texture right away. Finally, don’t skip the halfway shake. This ensures all sides get that golden look. Cooking times vary by air fryer brand and model. If your air fryer runs hot, check the chicken a minute or two early. For less powerful models, you might need to add a minute or two. A good rule is to start with 10 minutes, then check for doneness. Chicken should be golden brown and reach an internal temperature of 165°F (74°C). Always trust your air fryer’s results! {{image_2}} You can use chicken breasts or thighs for this dish. Chicken thighs offer more flavor and moisture. They also stay tender and juicy during cooking. On the other hand, chicken breasts are leaner. They cook quickly and can be healthier. Choose breasts for a lighter meal. Choose thighs for rich taste and softness. Both options work well with the orange sauce. To make this dish gluten-free, swap regular flour for gluten-free flour. Use cornstarch to keep that crispy texture. Ensure your soy sauce is gluten-free too. Many brands offer tamari, a great gluten-free option. With these swaps, you get the same tasty dish without gluten. You can change the sauce for a new twist. Try teriyaki sauce for sweetness and umami. Alternatively, use sweet chili sauce for heat. Add fresh ginger or chili flakes for extra flavor. These changes keep the dish exciting and unique. Feel free to experiment and find your favorite! To store your Air Fryer Orange Chicken, let it cool first. Place the chicken in an airtight container. Make sure the lid is tight to keep it fresh. Store it in the fridge for up to three days. If you need to keep it longer, freeze it. To reheat, use the air fryer for best results. Set it to 350°F (175°C). Heat the chicken for about 5-7 minutes. This keeps it crispy and tasty. You can also use a microwave. However, it may become soggy. For freezing, place the chicken in a freezer-safe bag. Squeeze out as much air as possible. Label the bag with the date and type. You can freeze it for up to three months. When you are ready to eat, thaw it overnight in the fridge before reheating. Yes, you can make Air Fryer Orange Chicken ahead of time. Cook the chicken and let it cool. Store it in an airtight container in the fridge. When you are ready to eat, reheat it in the air fryer for about 5 minutes at 400°F (200°C). This keeps the chicken crispy and tasty. Many sides go well with Air Fryer Orange Chicken. Here are some great options: - Steamed rice - Fried rice - Broccoli - Green beans - Side salad These sides balance the sweet and tangy flavors of the dish. Yes, Air Fryer Orange Chicken is healthier than the traditional fried version. Air frying uses less oil, cutting down on fat. The chicken stays crispy without soaking in oil. You still get all the flavor with fewer calories. Enjoying this dish can be guilt-free! You learned how to make tasty Air Fryer Orange Chicken. We covered important steps, from choosing the right chicken and coatings to cooking and serving tips. Remember, using pantry staples makes it easy, and the right garnishes boost flavor. Exploring variations helps you create new meals your way. Store extras well for future enjoyment. Enjoy this dish for a quick meal or impress guests. With these tips, you’ll cook like a pro. Now, get cooking and have fun!

Air Fryer Orange Chicken Easy and Flavorful Delight

Do you crave a quick, tasty meal? Air Fryer Orange Chicken is your answer. This dish is packed with flavor

- 2 cups all-purpose flour - 1 teaspoon baking powder - 1 teaspoon baking soda - 1 teaspoon ground cinnamon - ½ teaspoon ground nutmeg - ½ teaspoon salt First, let's gather our dry ingredients. The all-purpose flour forms the base of the loaf. Baking powder and baking soda help it rise. Cinnamon and nutmeg add warm flavors, while salt balances the sweetness. - 1 cup granulated sugar - ½ cup brown sugar, packed - 1 cup vegetable oil - 4 large eggs Next, we need the wet ingredients. Granulated sugar and brown sugar add sweetness and depth. Vegetable oil keeps the loaf moist. The four large eggs bind everything together and add richness. - 3 cups grated carrots (about 4 medium carrots) - 1 cup crushed pineapple, drained - ½ cup chopped walnuts (optional) - ½ cup raisins (optional) Now for the fun part—mix-ins! Grated carrots give the loaf its name and sweetness. Crushed pineapple adds moisture and a tropical twist. You can also add walnuts and raisins for extra texture and flavor. - ½ cup maple syrup (for glaze) - 2 tablespoons unsalted butter - 1 cup powdered sugar For the glaze, we use maple syrup, which gives that lovely, sweet flavor. Unsalted butter adds creaminess, while powdered sugar helps us achieve that smooth, glossy finish. With these ingredients ready, you will create a tasty maple glazed carrot cake loaf that delights the senses! - Preheat your oven to 350°F (175°C). - Grease and flour a 9x5 inch loaf pan or line it with parchment paper. - In a large bowl, whisk together the flour, baking powder, baking soda, cinnamon, nutmeg, and salt. - In another bowl, beat the granulated sugar, brown sugar, and vegetable oil until creamy. - Add the eggs one by one, mixing well after each. - Stir in the grated carrots and crushed pineapple until well mixed. - Gradually add the dry mix to the wet mix, stirring until just combined. - If you like, fold in chopped walnuts and raisins for extra crunch. - Pour the batter into the prepared loaf pan, smoothing the top with a spatula. - Bake it for 55-60 minutes. Check with a toothpick in the center; it should come out clean. - While the loaf bakes, prepare the maple glaze. Melt the butter in a small pan over low heat. - Stir in the maple syrup and mix in powdered sugar until smooth. - Allow the carrot cake to cool in the pan for 10 minutes. Then turn it out onto a wire rack. - Drizzle the maple glaze over the loaf once it's cool. - For a lovely touch, serve slices on a wooden board. Add extra grated carrots and a drizzle of maple syrup on top for flair. To ensure your carrot cake loaf is perfect, test for doneness using a toothpick. Insert it into the center of the loaf. If it comes out clean, your loaf is ready. If it has wet batter, give it more time in the oven. Baking times can vary depending on your oven. Some ovens cook hotter or cooler than others. If your loaf seems to bake too quickly or slowly, adjust the time. Start checking for doneness early. This way, you avoid overbaking. A smooth glaze adds the finishing touch to your loaf. To achieve the right consistency, mix the powdered sugar slowly into the maple syrup. This helps prevent lumps. Whisk well until it is glossy and smooth. You can flavor your glaze too! Consider adding a bit of vanilla extract or a pinch of cinnamon. These add more depth to the flavor. Experiment with flavors you love for a personal touch. Overmixing the batter is a common mistake. This can make your loaf dense. Mix just until the dry and wet ingredients are combined. A few lumps are okay. When it comes to pineapple, use fresh for the best flavor. Canned pineapple can be too wet and change the loaf's texture. If you use canned, make sure to drain it well. This keeps your loaf from becoming soggy. {{image_2}} You can swap out all-purpose flour for whole wheat flour or almond flour. Whole wheat adds fiber and gives a nutty taste. Almond flour makes the cake moist and is good for gluten-free diets. For oil, try coconut oil instead of vegetable oil. Coconut oil adds richness and a hint of sweetness. Want more flavor? Add spices like ginger or cloves to the batter. These spices give warmth and depth to the cake. You can also add orange or lemon zest for a fresh twist. The citrus notes brighten the flavors and make each bite delightful. If you're gluten-free, use a gluten-free flour blend. This keeps the texture light and fluffy. For vegan options, replace eggs with flax eggs or applesauce. This makes the loaf plant-based while keeping it tasty and moist. Each variation helps you create a cake that fits your needs. To keep your maple glazed carrot cake loaf fresh, store it at room temperature. Wrap it in plastic wrap or foil. This will prevent it from drying out. You can also use an airtight container to keep it moist. If you have a large loaf, slice it first. This makes it easy to grab a slice later. If you want to freeze your loaf, wrap it tightly in plastic wrap. Then, place it in a freezer bag. This will keep out air and prevent freezer burn. Your loaf can stay fresh for up to three months in the freezer. To thaw, leave it in the fridge overnight. You can also let it sit at room temperature for a few hours. When you want to enjoy a slice, I recommend using the oven. Preheat it to 350°F (175°C). Place the slice on a baking sheet and heat for about 10 minutes. This helps keep the texture nice and soft. You can also use a microwave. Heat for about 20-30 seconds, but this can make it a bit more moist. Enjoy your delicious slice warm! To make your carrot cake loaf moist, focus on these factors: - Use fresh, grated carrots for better moisture. - Add crushed pineapple, which adds natural juice. - Consider adding yogurt or applesauce for extra moisture. These ingredients help create a tender crumb that melts in your mouth. Yes, you can substitute maple syrup in the glaze. Try these options: - Honey for a floral sweetness. - Agave syrup for a milder flavor. - Brown sugar mixed with a bit of water for a rich taste. Each choice gives a unique twist to your glaze while keeping it sweet. The carrot cake loaf lasts about 3 to 5 days at room temperature. Store it in an airtight container to keep it fresh. Watch for signs of spoilage, like mold or a change in smell. If you want to keep it longer, freeze it for up to 3 months. Yes, you can make this recipe as cupcakes! Adjust the baking time to about 18 to 22 minutes. Check for doneness by inserting a toothpick; it should come out clean. Cupcakes will be fun for parties and easier to serve! This blog post covered how to make a delicious carrot cake loaf from scratch. We discussed each ingredient, including dry and wet components, mix-ins, and the tasty maple glaze. Then, we outlined simple steps for preparation, baking, and serving. I shared useful tips to avoid common mistakes and variations to fit your diet. In conclusion, this recipe is easy and fun. You can adjust ingredients to make it your own. Enjoy making your loaf and sharing it with others!

Maple Glazed Carrot Cake Loaf Delightful and Easy Recipe

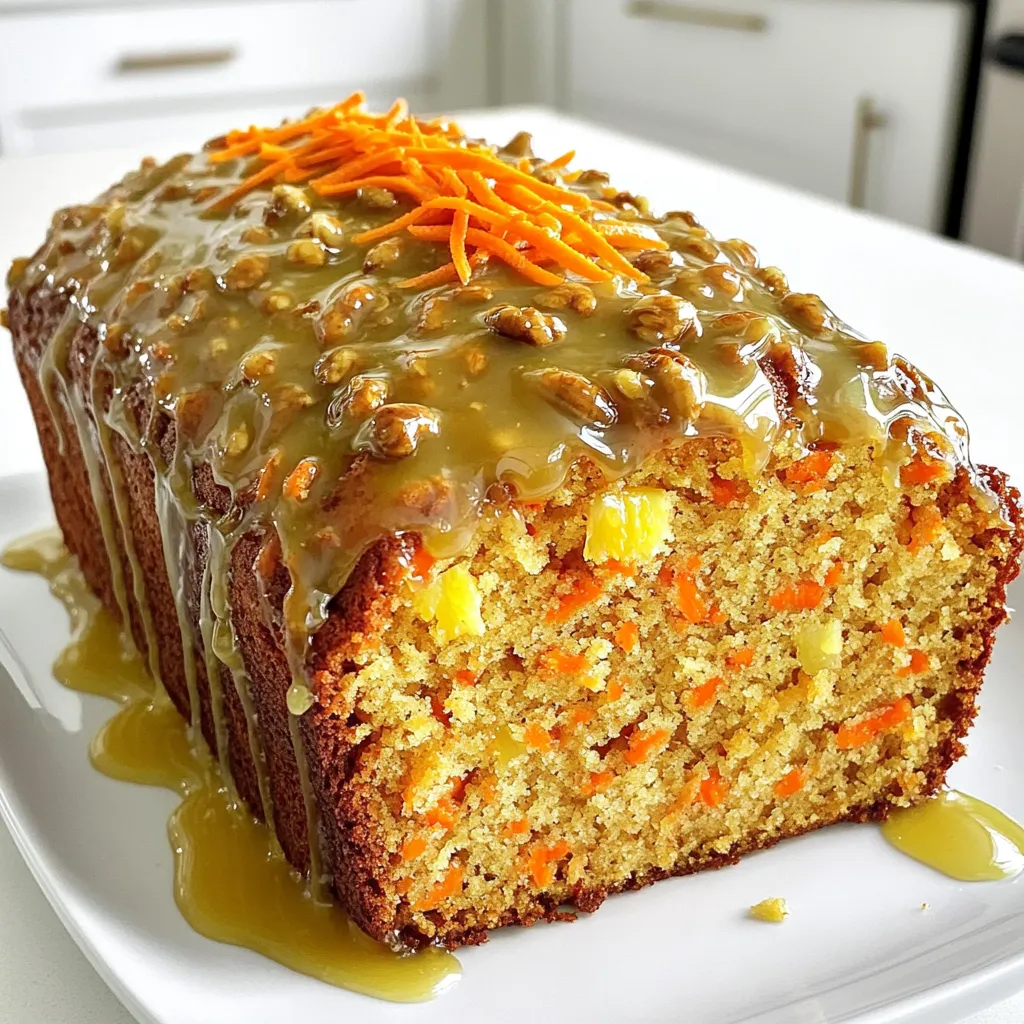
Are you ready to indulge in a sweet treat that’s easy to make? This Maple Glazed Carrot Cake Loaf combines

- 2 lbs beef chuck roast - 1 onion, thinly sliced - 4 cloves garlic, minced The main stars of this dish are the beef chuck roast, onion, and garlic. The beef chuck roast is great for slow cooking. It becomes tender and juicy. The onion adds sweetness, while the garlic gives a nice kick. - 2 cups beef broth - 2 tablespoons Worcestershire sauce - 1 teaspoon dried thyme - 1 teaspoon dried rosemary These flavor enhancers are key to a rich taste. The beef broth keeps the meat moist. Worcestershire sauce adds depth. Thyme and rosemary give it a lovely herb flavor. Don’t forget to add salt and pepper to taste. - 4 hoagie rolls - 8 slices provolone cheese - Fresh parsley, chopped (for garnish) The hoagie rolls cradle the beef and cheese perfectly. Provolone cheese melts beautifully over the meat. Fresh parsley adds a pop of color and freshness. Together, they create a balanced and tasty sandwich. - Seasoning the roast First, take the beef chuck roast and season it well with salt and pepper. Make sure to coat all sides. This step is key for great flavor. - Searing the roast Next, heat a large skillet over medium-high heat. Add the roast and sear it for about 3-4 minutes on each side. Look for a nice brown color. Searing locks in juices and adds rich taste. - Combining ingredients in the slow cooker In your slow cooker, add the sliced onion and minced garlic. Pour in the beef broth and Worcestershire sauce. Sprinkle the dried thyme and rosemary over the mixture. Stir it well to combine everything. - Cooking time and temperature options Now, place the seared roast into the slow cooker. Make sure it is mostly submerged in the broth. Cover the slow cooker and choose your cooking time. You can cook it on low for 8 hours or high for 4 hours. Both options will make the beef tender. - Shredding the beef After cooking, carefully remove the roast from the slow cooker. Use two forks to shred the beef into bite-sized pieces. Return the shredded beef to the slow cooker to soak up more broth. This adds even more flavor. - Baking the hoagie rolls with cheese Preheat your oven to 375°F (190°C). Cut the hoagie rolls in half and place them on a baking sheet. Layer the shredded beef onto each roll. Top with provolone cheese. Bake them in the oven for about 5-7 minutes until the cheese melts and bubbles. Serve these sandwiches with a small bowl of beef broth for dipping. Seasoning is key. It brings out the beef's natural taste. I always use salt and pepper first. Generous amounts make a big difference. Searing the roast is another step I love. This creates a nice crust. It adds rich, deep flavor to your dish. I sear each side for about 3-4 minutes. This step is worth the time. You can choose between high and low settings on your slow cooker. Low gives you tender beef after 8 hours. High cooks it in about 4 hours. I prefer low for the best taste and texture. To ensure beef tenderness, you need the right cut. Chuck roast is perfect. It breaks down well during cooking, making it soft and easy to shred. Pair your sandwiches with tasty sides. I like crispy fries or a fresh salad. A cold drink like iced tea or soda works well too. For a nice touch, plate your sandwiches with a small bowl of broth. This adds a fun dipping element. Garnishing with fresh parsley brightens up the plate, making it look great. {{image_2}} You can change the meat if you want. Try using pork or chicken instead of beef. These meats will give you a new taste that’s just as delicious. You can also switch up the cheese. Provolone is great, but you can use Swiss or mozzarella. Both melt well and add a different flavor to your sandwich. Adding spices can take your French dip to the next level. Try a bit of smoked paprika for warmth or crushed red pepper for some heat. Fresh herbs, like basil or parsley, can also brighten the flavor. You can mix in vegetables too. Sliced bell peppers or mushrooms can add texture and taste. For a tangy kick, consider adding a spoonful of Dijon mustard or some horseradish to the broth. You can make French dip sliders for a fun twist. Just use small rolls instead of hoagies. Fill them with the shredded beef and cheese, then bake until melted. Another idea is to make a French dip casserole. Layer the beef, cheese, and bread in a baking dish. Pour some broth over it and bake until everything is warm and bubbly. It’s a cozy meal that’s perfect for sharing! To store leftovers, first let the beef cool. Place it in an airtight container. Add the broth and any extra juice from the slow cooker. Seal the container tightly. You can keep the sandwiches separate if you prefer. In the fridge, your leftovers will stay fresh for up to 3 days. For freezing, start by shredding the beef and letting it cool completely. Place the shredded beef and broth in freezer-safe bags. Squeeze out the air and seal them well. Label each bag with the date. You can freeze it for up to 3 months. When you are ready to eat, take a bag out of the freezer. Thaw it in the fridge overnight. To reheat, use the stovetop or microwave. Make sure it heats to a safe temperature. If you want, you can toast the hoagie rolls again with cheese before serving. Enjoy! Can I use a different cut of beef? Yes, you can use other cuts like brisket or round. Chuck roast is great for its tenderness. It falls apart nicely when cooked. If you choose a leaner cut, monitor cooking time closely. It may dry out faster. How can I make this recipe gluten-free? To make this dish gluten-free, swap the hoagie rolls. Use gluten-free rolls or lettuce wraps. Check that your beef broth and Worcestershire sauce are gluten-free. Many brands offer gluten-free options, so read the labels. How long can I keep leftovers? You can keep leftovers in the fridge for up to three days. Store them in an airtight container. If you want to keep them longer, you can freeze them for up to three months. Can I prepare this ahead of time? Yes, you can prepare the beef a day ahead. Cook it in the slow cooker and store it in the fridge. Just reheat it on the stove or in the slow cooker before serving. What to serve with French dip sandwiches? Pair these sandwiches with crispy fries or a fresh salad. You can also serve them with chips or a warm bowl of soup. These sides balance the meal nicely. How do I reheat the sandwiches? To reheat, place the sandwich in the oven at 375°F (190°C) for about 5 minutes. You can also use a microwave for a quick option. Just make sure to keep the beef moist. Use a little broth if needed. This blog covers a delicious French dip sandwich recipe. You learned about key ingredients, like beef chuck roast, onions, and Worcestershire sauce. I shared easy step-by-step instructions for cooking the beef and assembling the sandwiches. You also found tips for flavor, storage, and even variations to try. In closing, this recipe is simple and perfect for any gathering. Enjoy the great taste and share it with others!

Savory Slow Cooker French Dip Sandwiches Recipe

Looking for a meal that’s warm, hearty, and easy to make? Savory Slow Cooker French Dip Sandwiches are your answer!

To make churro donut holes, gather these simple ingredients: - 1 cup all-purpose flour - 1/2 cup milk - 1/4 cup granulated sugar - 2 teaspoons baking powder - 1/4 teaspoon salt - 1/4 cup unsalted butter, melted - 1 large egg - 1 teaspoon vanilla extract - 1/2 cup granulated sugar (for coating) - 2 teaspoons ground cinnamon (for coating) - Oil for frying For added flavor, you can consider these options: - A pinch of nutmeg for warmth - A splash of almond extract for a nutty taste - A few drops of orange zest for brightness If you need substitutions, here are a few ideas: - Use whole wheat flour instead of all-purpose flour for more fiber. - Swap almond milk for regular milk to make it dairy-free. - Replace granulated sugar with coconut sugar for a lower glycemic index. - Use margarine instead of butter if you want a vegan option. To make churro donut holes, start by mixing the dry ingredients. In a bowl, add 1 cup of all-purpose flour, 2 teaspoons of baking powder, and 1/4 teaspoon of salt. Use a whisk to blend them well. Next, mix the wet ingredients in a separate bowl. Combine 1/2 cup of milk, 1/4 cup of melted unsalted butter, 1 large egg, 1 teaspoon of vanilla extract, and 1/4 cup of granulated sugar. Stir until the mixture is smooth. Now, slowly add the wet mix to the dry mix. Stir gently until just combined. The batter should feel thick but not dry. Heat oil in a deep pan until it reaches 350°F (175°C). Use a thermometer to check the temperature. This step is key for getting crispy donut holes. When the oil is hot, use a small cookie scoop or your hands to form small balls of dough, about 1 inch wide. Carefully drop a few into the hot oil. Do not overcrowd the pan; this can lower the oil's temperature. Fry each donut hole for about 2-3 minutes. They should turn golden brown. Once they are done, remove them and let them drain on a paper towel-lined plate. This helps remove excess oil and keeps them light. While the donut holes are still warm, prepare to coat them. In a shallow bowl, mix 1/2 cup of granulated sugar with 2 teaspoons of ground cinnamon. Gently roll each warm donut hole in the cinnamon-sugar mixture. Make sure they are well coated. This adds a sweet touch that makes them irresistible. Enjoy your churro donut holes warm for the best taste! Frying churro donut holes can seem tricky, but I have some tips to help. First, use a deep pan for even heat. Fill the pan with oil to at least two inches deep. Heat the oil to 350°F (175°C) before frying. Use a thermometer to check the temperature. If the oil is too cool, the donut holes will absorb too much oil. If it’s too hot, they will burn. When dropping the dough into the oil, do it in small batches. This way, they have room to float. Fry for about 2-3 minutes on each side. Look for a golden brown color. Use a slotted spoon to remove them, and place them on paper towels to drain excess oil. To keep your churro donut holes fresh, store them in an airtight container at room temperature. They taste best the same day, but you can keep them for up to two days. If they become a bit hard, pop them in the microwave for a few seconds. This will soften them up again. If you want to keep them longer, consider freezing them. Place the cooled donut holes in a single layer on a baking sheet. Freeze them for a few hours, then transfer them to a freezer bag. They can last for up to three months. When you’re ready to enjoy them, thaw and reheat in the oven. Churro donut holes are delicious on their own, but you can make them even better! Serve them warm, rolled in cinnamon-sugar, for a sweet treat. Pair them with dipping sauces like chocolate or caramel. You can also serve them with a cup of coffee or hot chocolate for a cozy moment. For fun, try adding toppings like sprinkles or a drizzle of icing. This adds a colorful touch. You can even serve them at parties or gatherings. Everyone will love these tasty bites! {{image_2}} You can change the taste of churro donut holes with fun flavors. For a chocolate twist, add cocoa powder to the dry mix. Try 1/4 cup of cocoa for a rich flavor. For a fall treat, use pumpkin spice. Just mix 1 teaspoon of pumpkin spice into the dry ingredients. You can also add a splash of almond extract for a nutty taste. The options are endless! Want to make these donut holes gluten-free? Swap the all-purpose flour for a gluten-free blend. Choose a blend that works well for baking. Most brands will give similar results in taste and texture. You might need to adjust the liquid. Add a little more milk if the dough feels too thick. Serve churro donut holes with fun dips! Chocolate sauce is a classic choice. You can also use caramel sauce or sweet cream cheese. For a fruity twist, try a berry sauce. To make it more exciting, serve with a sprinkle of sea salt on top. This adds a nice contrast to the sweet flavors. You can even create a donut hole bar! Let guests choose their favorite dips and toppings. To keep your churro donut holes fresh, store them in an airtight container. Make sure they cool completely before sealing. This helps prevent sogginess. They stay good for up to two days at room temperature. If you want them to last longer, consider refrigerating them. They can stay fresh in the fridge for about one week. When you want to enjoy your churro donut holes again, reheating is easy. You can use a microwave or an oven. For the microwave, heat them for about 10-15 seconds. This warms them up but might make them a bit soft. If you prefer a crispy texture, use the oven. Preheat it to 350°F (175°C). Place the donut holes on a baking sheet and heat them for about 5-7 minutes. Freezing churro donut holes is a great way to save them for later. First, let them cool completely. Then, place them in a single layer on a baking sheet. Freeze them for about one hour. After they are firm, transfer them to a freezer bag. Be sure to remove as much air as possible. They can stay in the freezer for up to three months. When you're ready to eat, thaw them in the fridge overnight and reheat as mentioned above. Yes, you can make churro donut holes in advance. You can prepare the dough and store it in the fridge for up to 24 hours. This way, you can fry them fresh when you are ready to eat. Just remember to let the dough sit at room temperature for about 15 minutes before frying. This helps the donut holes cook evenly. For frying churro donut holes, use oils with a high smoke point. Good options include vegetable oil, canola oil, or peanut oil. These oils help fry the dough without burning. Make sure to heat the oil to 350°F (175°C) for the best results. The right temperature ensures that the donut holes cook evenly and get that nice golden color. You can tell that the donut holes are done when they turn a golden brown color. This usually takes about 2-3 minutes on each side. If you want to be extra sure, you can use a kitchen thermometer. The inside should reach about 190°F (88°C) when they are fully cooked. Another way is to poke one with a toothpick. If it comes out clean, they are ready! Churro donut holes are fun and tasty treats. We covered their ingredients, ways to make them, and tips. You learned how to fry them perfectly and keep them fresh. You can also explore unique flavors and serving ideas. With proper storage, these treats can last longer. Enjoy making churro donut holes and share them with friends. They'll love these sweet bites just as much as you do!

Churro Donut Holes Tasty and Easy Treat Recipe

If you love sweet treats, you’ll adore these Churro Donut Holes! They combine the soft, fluffy joy of donuts with

- 12 oz (340 g) pasta (shells or rotini work well) - 1 lb (450 g) ground beef (or turkey) - 1 small onion, diced - 2 cloves garlic, minced - 1 packet taco seasoning - 1 can (15 oz) diced tomatoes with green chilies - 4 cups chicken or vegetable broth - 1 cup corn (frozen or canned) - 1 cup shredded cheddar cheese - 1 cup shredded Monterey Jack cheese - 1 tablespoon olive oil - Salt and pepper to taste - Fresh cilantro, chopped for garnish (optional) I love using simple ingredients to make this dish come alive. For the pasta, I often pick shells or rotini. They hold the cheesy sauce so well. Ground beef is my go-to meat, but turkey works too if you want a lighter option. For veggies, I always add a small diced onion and two cloves of minced garlic. They add great flavor. The canned diced tomatoes with green chilies give a nice kick. You can use chicken or vegetable broth for a rich base. Taco seasoning is key. It brings all the flavors together. I also like to toss in a cup of corn for sweetness. Now, let’s get cheesy! I use both cheddar and Monterey Jack cheese. They melt beautifully and make the dish creamy. Don’t forget the olive oil to sauté the onion. A little salt and pepper helps too. If you like, you can garnish with fresh cilantro. It adds color and freshness to the dish. Enjoy these ingredients to create a tasty, one-pot meal! - Sautéing the onion First, heat olive oil in a large pot over medium heat. Add the diced onion and sauté it for about 4-5 minutes. You want the onion to be soft and translucent. This step builds a great base flavor. - Cooking the garlic Next, add the minced garlic to the pot. Cook it for about one minute. You will know it's ready when it smells fragrant. Garlic adds depth to the dish. - Browning the ground meat Now, add the ground beef or turkey. Cook the meat until it is browned and no longer pink, which should take about 5-7 minutes. Make sure to break up any large pieces. If needed, drain excess fat to keep it lean. - Adding in the seasoning Sprinkle in the taco seasoning. Stir well to coat the meat evenly. This step gives your dish that classic taco flavor. - Incorporating liquid ingredients Pour in the can of diced tomatoes and the chicken or vegetable broth. Add the corn as well. Stir everything together until mixed. - Adding uncooked pasta Bring the mixture to a boil. Once boiling, add the uncooked pasta. Stir again to combine, then reduce the heat to low. - Simmering and stirring Cover the pot and let it simmer for about 12-15 minutes. Stir occasionally. You want the pasta to be al dente and most of the liquid absorbed. - Melting the cheeses Remove the pot from heat. Stir in the shredded cheddar and Monterey Jack cheeses. Mix until the cheeses melt and become creamy. - Seasoning and garnishing Taste your dish and season with salt and pepper as needed. If you want, add chopped cilantro for a fresh touch. - Recommended resting time before serving Let the pasta sit for a few minutes. This helps the dish thicken slightly. Now, it's ready to serve! - Choosing the right pasta: I often use shells or rotini. They hold sauce well and add a fun twist to each bite. - Adjusting seasoning to taste: Start with the taco seasoning packet. Then, taste and add more salt or pepper as needed. Your palate is the best guide! - How to avoid sticky pasta: Stir the pasta while it cooks. This helps separate the pieces and keeps them from clumping together. - Techniques for browning meat: Use medium heat and break the meat into small pieces. This helps it brown evenly and cook faster. - Effective ways to simmer pasta: Once you add the pasta, keep the pot covered. This traps steam and cooks the pasta perfectly. Stir occasionally to avoid sticking. - Tips for cheese melting: Add cheese at the end and stir until it melts. Reduce the heat to low to keep it creamy without burning. - Garnishing ideas with cilantro: Sprinkle chopped cilantro on top just before serving. This adds freshness and a pop of color. - Serving styles and dishware: Use a large bowl for a family-style meal. It makes serving easy and fun. - Accompanying side dishes: Pair your pasta with a simple salad or tortilla chips for crunch. This creates a well-rounded meal. {{image_2}} You can easily change up this dish to suit your needs. Here are some ideas: - Vegetarian alternatives: Use black beans or lentils instead of meat. This adds protein and fiber. - Different protein options: Ground turkey, chicken, or even tofu work well. Just adjust cooking times as needed. - Cheese substitutions: Try pepper jack for a spicy kick or a dairy-free cheese if you need it. Boost the taste of your One Pot Cheesy Taco Pasta with these simple tweaks: - Adding spices for extra heat: Toss in some cayenne pepper or jalapeños for a spicy twist. - Incorporating vegetables: Bell peppers, zucchini, or spinach make great additions. They add color and nutrients. - Using different broth types: Swap chicken broth for vegetable broth or even beef broth for a richer flavor. How you serve your dish can make it even better: - Pairing with toppings like sour cream: A dollop of sour cream adds creaminess and balances the spice. - Options for incorporating avocado: Sliced or mashed avocado brings a fresh taste and creamy texture. - Serving with tortilla chips: Crunchy chips add a fun texture. Use them to scoop up your cheesy pasta! To store leftover pasta, wait until it cools. Use a large bowl or container. I recommend glass or plastic containers with lids. They keep the pasta fresh. Store in the fridge for up to three days. To freeze the dish, let it cool completely. Then, transfer it to a freezer-safe container. You can also use freezer bags. Make sure to remove as much air as possible. This helps prevent freezer burn. You can freeze for about three months. The best method for reheating is in a pot on low heat. Stir in a splash of broth or milk. This helps keep the pasta creamy. You can also use a microwave. Heat in short bursts, stirring often. This keeps it from drying out. Can I make One Pot Cheesy Taco Pasta ahead of time? Yes, you can make this dish ahead. Cook it, then let it cool. Store it in the fridge for up to three days. Reheat it on the stove or in the microwave. What can I serve with One Pot Cheesy Taco Pasta? You can serve this pasta with a simple side salad. Tortilla chips or garlic bread also work well. Consider adding sliced avocados for a fresh touch. How do I make this recipe spicy? To spice it up, add diced jalapeños or a pinch of cayenne pepper. You can also use spicy taco seasoning for more heat. Is it possible to make this dish gluten-free? Yes, simply swap regular pasta for gluten-free pasta. Check the broth and seasoning packets for gluten as well. Can I use dairy-free cheese in this recipe? Absolutely! Substitute regular cheese with your favorite dairy-free cheese. It will still melt nicely and taste great. This blog post covered the key ingredients and steps to make One Pot Cheesy Taco Pasta. You learned about the meat and veggie choices, along with tips for perfecting your dish. Remember, you can customize it with different flavors or ingredients. Store leftovers properly to keep them fresh. Make it your own by trying new variations. Enjoy this easy and tasty meal again and again. Cooking can be fun and creative!

One Pot Cheesy Taco Pasta Quick and Tasty Meal

Are you ready to whip up a quick and tasty meal that’ll please everyone? One Pot Cheesy Taco Pasta combines

- 1 pound Brussels sprouts, halved - 3 tablespoons olive oil - 4 cloves garlic, minced - 1/2 cup grated Parmesan cheese - 1 teaspoon garlic powder - 1 teaspoon onion powder - 1/2 teaspoon crushed red pepper flakes (optional for heat) - Salt and pepper to taste - Lemon wedges for serving - Herbs (e.g., thyme or rosemary) - Balsamic glaze The right ingredients make all the difference in your dish. For this recipe, I choose one pound of Brussels sprouts. Halving them helps cook them evenly. I use three tablespoons of olive oil to keep them moist and add flavor. Four cloves of minced garlic give a strong punch of taste. Next, I add half a cup of grated Parmesan cheese. This cheese turns golden and crispy in the air fryer. One teaspoon of garlic powder and one teaspoon of onion powder add depth. If you like heat, add half a teaspoon of crushed red pepper flakes. Don’t forget salt and pepper to taste! For a fresh twist, serve with lemon wedges. A squeeze of lemon brightens the dish. You can also mix in some herbs like thyme or rosemary for extra flair. A drizzle of balsamic glaze adds a sweet note. These options can really boost the flavor! Preheat your air fryer to 375°F (190°C). This step takes about 5 minutes. Preheating helps achieve a crispy texture. In a large bowl, add the halved Brussels sprouts. Pour in 3 tablespoons of olive oil. Add 4 cloves of minced garlic, 1 teaspoon of garlic powder, and 1 teaspoon of onion powder. If you like heat, sprinkle in 1/2 teaspoon of crushed red pepper flakes. Season with salt and pepper to taste. Toss everything together until the Brussels sprouts are evenly coated. Now, add 1/2 cup of grated Parmesan cheese. Gently toss again so the cheese sticks to the sprouts. This cheese adds a rich flavor that pairs perfectly with the garlic. Place the seasoned Brussels sprouts in the air fryer basket. Lay them in a single layer to ensure even cooking. You may need to cook in batches if your air fryer is small. Air fry the Brussels sprouts for 15-20 minutes. Shake the basket halfway through. This helps them crisp up nicely. When they turn golden brown, they are ready to serve. Carefully remove the Brussels sprouts from the air fryer. Transfer them to a serving dish. Enjoy them fresh with lemon wedges on the side for a bright finish. To get the best crispiness, cook the Brussels sprouts in a single layer. This step helps hot air circulate around each piece. If the sprouts overlap, they will steam instead of fry. Always check your air fryer’s basket size. You may need to work in batches for the best results. To prepare your Brussels sprouts, start by trimming the stem ends. Then, slice each sprout in half from top to bottom. This method ensures even cooking and makes them easier to coat with the seasoning. Make sure to wash them well before cutting. Clean sprouts will taste better and be more enjoyable. Feel free to adjust the seasonings to match your taste. If you enjoy spice, add more crushed red pepper flakes. For a more robust flavor, try adding fresh herbs like thyme or rosemary. You can also drizzle balsamic glaze over the cooked sprouts for a sweet touch. Experimenting with flavors keeps the recipe exciting and personalized. {{image_2}} To make your Brussels sprouts spicier, add more crushed red pepper flakes. Start with an extra half teaspoon, and adjust to your taste. The heat from the flakes pairs well with the garlic and cheese. This kick adds depth and makes these sprouts a tasty side dish. You can also try adding hot sauce for more heat. Experiment until you find your favorite balance. If you want a vegan version, simply swap out the Parmesan cheese for nutritional yeast. Nutritional yeast gives a cheesy flavor without dairy. Use half a cup, just like the cheese. It’s a great way to enjoy these sprouts while keeping them plant-based. Plus, nutritional yeast is packed with nutrients, making this option even better. You can mix Brussels sprouts with other air fryer-friendly vegetables. Try adding carrots, bell peppers, or zucchini. Cut them into similar sizes to ensure even cooking. Toss them with the same garlic and oil mix for great flavor. This not only boosts nutrition but also adds color to your dish. Have fun experimenting with different combinations! To keep your Brussels sprouts fresh, place them in an airtight container. Store them in the fridge for up to three days. Make sure they are completely cool before sealing the container. This helps to prevent moisture buildup. If you notice any sogginess, a paper towel can help absorb excess moisture. When it’s time to eat the leftovers, reheat them in the air fryer. Set the air fryer to 350°F (175°C) for about 5 to 7 minutes. This method helps keep them crispy. Shake the basket halfway through to ensure even heating. Avoid using the microwave, as it can make them soggy. Yes, you can freeze cooked Brussels sprouts! Allow them to cool completely, then place them in a freezer bag. Remove as much air as possible before sealing. They can stay fresh for up to three months in the freezer. To use them later, thaw them in the fridge overnight before reheating. You can tell Brussels sprouts are done when they turn golden brown and crispy. They should take about 15 to 20 minutes to cook. Shake the basket halfway through to help them cook evenly. Test a sprout by piercing it with a fork. It should be tender inside. Yes, you can use frozen Brussels sprouts. However, they may need a longer cooking time. Make sure to thaw and drain them first. This will help avoid excess moisture. Toss them with olive oil and spices just like fresh sprouts. These Brussels sprouts pair well with many dishes. Here are some great options: - Grilled chicken - Baked salmon - Pasta with olive oil - Quinoa salad - Steak or pork chops You can prep the Brussels sprouts ahead of time. Toss them in oil and spices, then store them in the fridge. Cook them fresh when you are ready to serve. This keeps them crispy and delicious. This blog post guided you through making Air Fryer Garlic Parmesan Brussels Sprouts. We covered key ingredients, step-by-step cooking instructions, and tips for the best results. You learned how to achieve maximum crispiness and even flavor. Also, we explored variations like spicy options and vegan alternatives. Enjoy trying out the recipe and making it your own. Trust me, these Brussels sprouts will impress everyone!

Air Fryer Garlic Parmesan Brussels Sprouts Flavor Boost

Looking for a delicious way to enjoy Brussels sprouts? My Air Fryer Garlic Parmesan Brussels Sprouts will change your mind

To make these tasty tacos, you need simple ingredients. Here’s what you’ll need: - 1 medium head of cauliflower, cut into florets - 2 tablespoons olive oil - 1 tablespoon taco seasoning - 8 corn tortillas - 1 cup shredded red cabbage - 1 ripe avocado, sliced - 1/2 cup fresh cilantro, chopped - 1 lime, cut into wedges - Salt and pepper to taste These ingredients come together to create a fun, tasty meal. You can take your tacos to the next level with some fun toppings. Here are some ideas: - Hot sauce for a spicy kick - Sliced jalapeños for extra heat - Diced tomatoes for freshness - Sour cream or yogurt for creaminess - Crumbled queso fresco for added flavor These toppings allow you to customize your tacos to fit your taste. While taco seasoning is great, you can mix it up with extra spices. Here are some great options: - Cumin adds warmth - Paprika gives a smoky flavor - Garlic powder adds depth - Onion powder offers more flavor Experimenting with these spices will enhance your tacos and make them unique. Enjoy your cooking! To start, take your medium head of cauliflower. Cut it into small florets. This helps them cook evenly. Place the florets in a large bowl. Add two tablespoons of olive oil. Sprinkle in one tablespoon of taco seasoning, along with salt and pepper to taste. Toss everything together. Make sure each floret is coated well. This step is key for flavor. Next, preheat your air fryer to 400°F (200°C) for about five minutes. Once it’s hot, add the cauliflower florets to the basket. Spread them out in one layer. This helps them crisp up nicely. Air fry them for 12 to 15 minutes. Remember to shake the basket halfway through. The cauliflower should turn golden brown and crispy when done. Now it’s time to build your tacos. While the cauliflower is cooking, warm your corn tortillas. You can wrap them in foil and place them in the air fryer for the last five minutes. Alternatively, use a skillet on medium heat for about 30 seconds on each side. Once warm, place a generous scoop of crispy cauliflower on each tortilla. Top with shredded red cabbage, sliced avocado, and fresh cilantro. Squeeze fresh lime juice over the top. Add hot sauce if you like it spicy! Enjoy your tasty tacos right away for the best crunch. When air frying, cut your veggies into even pieces. This helps them cook at the same rate. Toss them in a bit of oil. A light coat of oil keeps them from sticking. Use your favorite seasoning for extra flavor. Keep the basket from overcrowding to let hot air circulate. To make your cauliflower crispy, make sure to dry it well after washing. If it's wet, it may steam instead of crisp. Toss the florets with oil and seasoning until each piece is coated. Air fry at 400°F for the best results. Shake the basket halfway through cooking. This ensures even browning and crispiness. Serve your tacos with fresh lime wedges to add a zesty kick. A drizzle of hot sauce can give them a nice heat. Consider adding some pickled onions for a tangy crunch. You can also top with a dollop of sour cream or yogurt for creaminess. Enjoy these tacos with a side of rice or beans for a complete meal. {{image_2}} To make these tacos vegan, simply stick to the basic recipe. All the ingredients already suit a vegan diet. For gluten-free tacos, use corn tortillas. They add a nice crunch without gluten. You can also try other gluten-free wraps, like lettuce leaves, if you want a fresh twist. You can swap out the cauliflower for other veggies. Try using mushrooms, zucchini, or bell peppers. If you want some protein, add beans or lentils. You can even use grilled chicken or shrimp if you prefer meat. Just season them well and cook until tender. This keeps the tacos exciting and full of flavor. You can make your taco seasoning at home. Mix chili powder, cumin, garlic powder, and paprika. For a spicy kick, add cayenne pepper or crushed red pepper flakes. Adjust the spices based on your taste. Another option is to add lime zest for a zesty flavor. This adds depth to the tacos without extra work. Experiment with different herbs like oregano or cilantro to find your favorite blend! After enjoying your cauliflower tacos, store the leftovers properly. Place the tacos in an airtight container. If you want the best taste, keep the filling separate from the tortillas. This way, the tortillas stay soft and do not get soggy. You can refrigerate them for up to three days. To enjoy your tacos again, use the air fryer. Preheat it to 350°F (175°C) for about three minutes. Place the tacos in the basket in a single layer. Heat them for about five to seven minutes. This method keeps the tacos crispy and warm. Check them halfway through to make sure they heat evenly. If you have extra cauliflower, freezing is a smart choice. Cut the florets and blanch them in boiling water for two minutes. Quickly cool them in ice water. Drain and pat them dry. Place the florets in a freezer bag, removing as much air as possible. You can store them in the freezer for up to three months. When you’re ready to use them, simply air fry them from frozen. Yes, you can use frozen cauliflower. Just make sure to thaw it first. Drain any extra water to avoid sogginess. Toss the thawed cauliflower with olive oil and taco seasoning as you would with fresh cauliflower. I recommend setting your air fryer to 400°F (200°C). This temperature cooks vegetables evenly and gives them a nice, crispy texture. It works well for a variety of veggies, not just cauliflower. To spice up your tacos, try adding more taco seasoning. You can also mix in cayenne pepper or chili powder with the seasoning. If you like heat, drizzle some hot sauce on top before serving. Absolutely! You can cut and season the cauliflower a few hours in advance. Just store it in the fridge until you're ready to air fry. This can save time when you want to enjoy your tacos quickly. Air fryer cauliflower tacos are easy and tasty. We covered the key ingredients and steps for prep, cooking, and serving. I shared tips for perfecting your tacos and variations to keep meals exciting. You can even store leftovers well for later. By exploring these ideas, you can enjoy a healthy meal that fits your style. Use this guide to create your own delicious version of cauliflower tacos anytime!

Air Fryer Cauliflower Tacos Quick and Tasty Recipe

If you’re craving a quick and tasty meal, look no further than Air Fryer Cauliflower Tacos. This recipe combines flavor

Older posts
Newer posts
← Previous Page1 … Page3 Page4 Page5 … Page86 Next →

dsad

© 2026 Emmas Dish • Built with GeneratePress

Our Policies

  • Copyright Policy
  • Cookie Policy
  • GDPR Policy
  • Privacy Policy
  • Disclaimer
  • Terms Of Use

More Information

  • Home
  • About
  • Contact
  • Appetizers
  • Dessert
  • Dinner
  • Drinks
©2026, Emmas Dish About Back To Top