No-Bake S’mores Cheesecake Cups Easy and Delicious Treat

WANT TO SAVE THIS RECIPE?

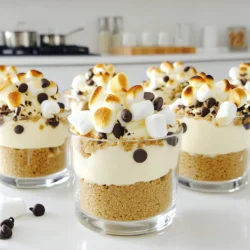
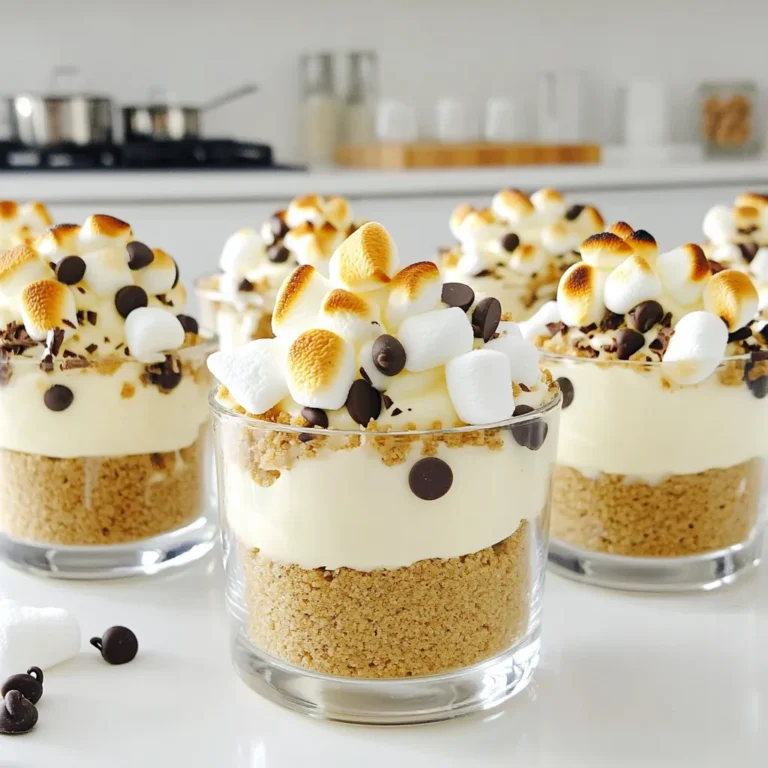
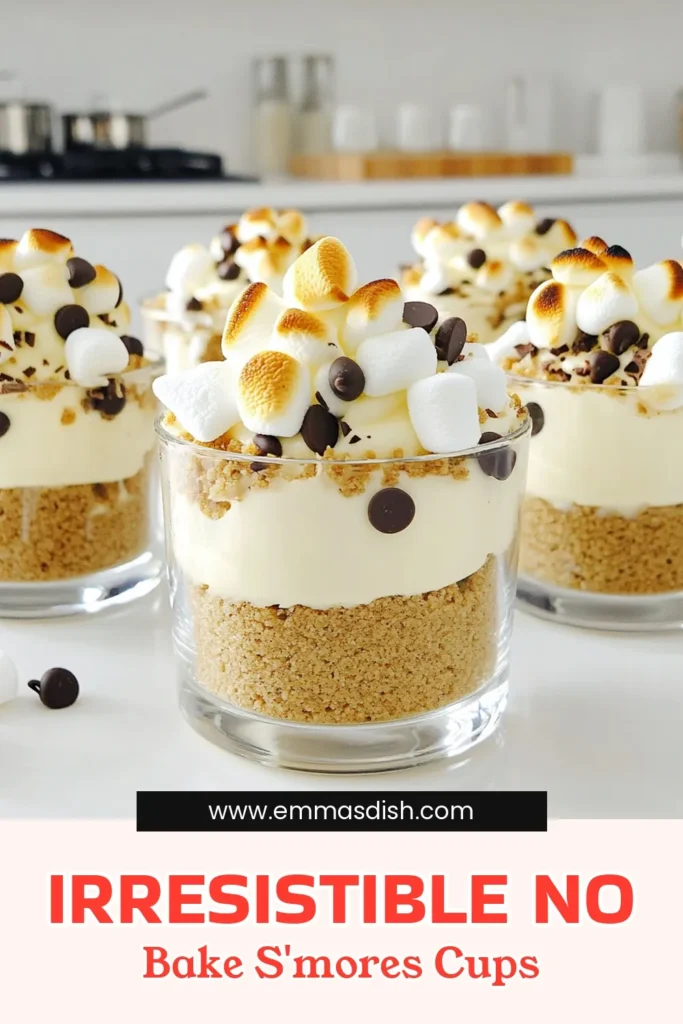
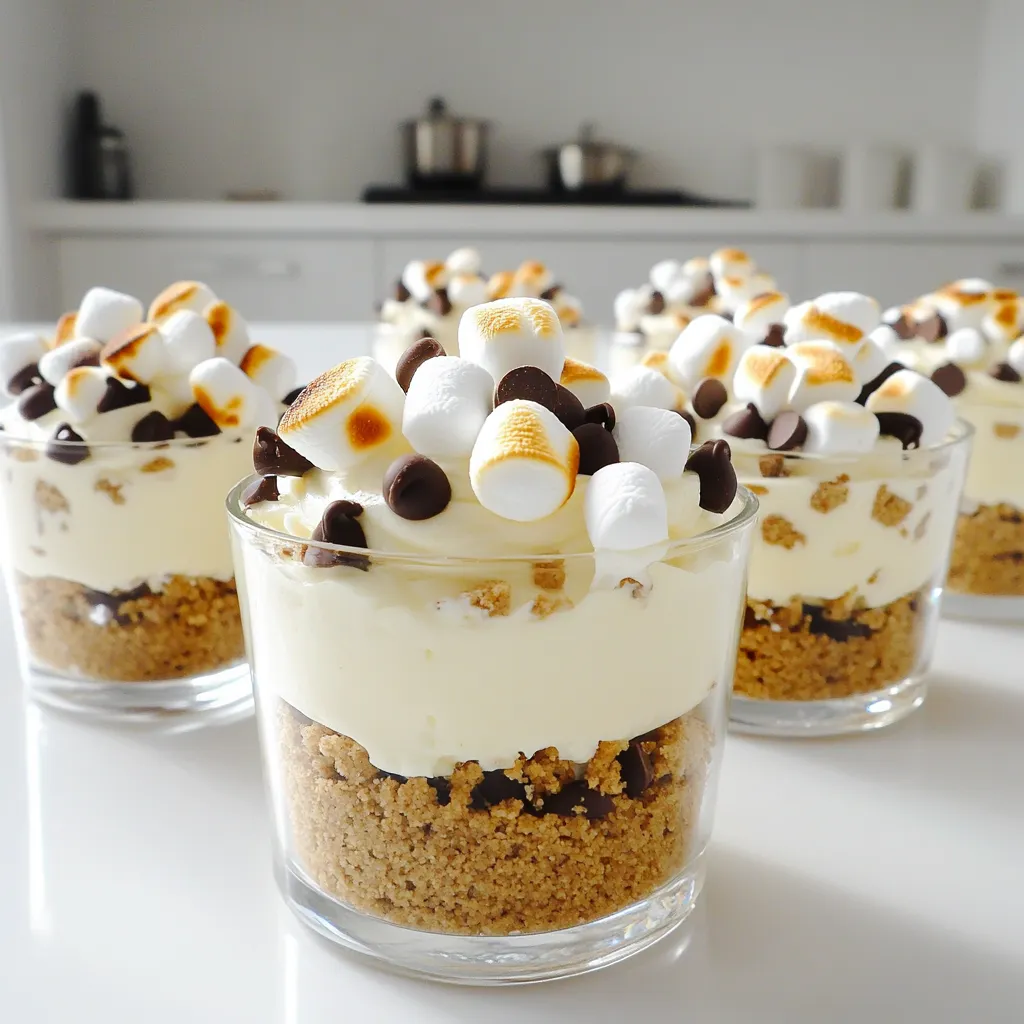
Get ready to indulge in a sweet treat with my No-Bake S’mores Cheesecake Cups! These easy, creamy, and delicious cups bring the classic campfire dessert right to your kitchen. You’ll love how simple they are to make, with layers of rich cheesecake and crunchy crust. If you crave the flavors of s’mores without the fuss of baking, you’re in the right place. Let’s dive into this tasty recipe!

Ingredients

List of Ingredients

Grahams and More: Key Components

– 1 cup graham cracker crumbs

– 4 tablespoons unsalted butter, melted

– 2 tablespoons granulated sugar

The base of this dessert is made from graham cracker crumbs. The melted butter helps bind them together. The granulated sugar adds just the right amount of sweetness.

Sweeteners and Creaminess

– 16 oz cream cheese, softened

– ½ cup powdered sugar

– 1 teaspoon vanilla extract

– 1 cup heavy whipping cream

Cream cheese gives the filling a rich texture. Powdered sugar sweetens it without grittiness. Vanilla extract adds a lovely aroma. Whipping cream makes the cheesecake light and fluffy.

Toppings and Garnishes

– 1 cup mini marshmallows

– ½ cup chocolate chips

– Additional mini marshmallows and chocolate shavings for topping

Mini marshmallows and chocolate chips mix into the filling for fun bites. You can top with toasted marshmallows and chocolate shavings for a beautiful finish. This adds extra flavor and makes the dessert look fancy.

Step-by-Step Instructions

Preparation of the Crust

Mixing the Base Ingredients

Start by mixing the graham cracker crumbs, melted butter, and granulated sugar in a bowl. Stir until the mix looks like wet sand. This mixture gives your crust a nice flavor and texture.

Creating the Crust Layer

Next, divide the crumb mixture into six cups. Press the crumbs down firmly to form a solid base. Make sure each cup has an even layer.

Chilling the Crust

Put the cups in the fridge for about 15 minutes. This helps the crust firm up before adding the filling.

Preparing the Cheesecake Filling

Beating the Cream Cheese

In a separate bowl, beat the softened cream cheese until it’s smooth. This step is key for a creamy filling.

Folding in Whipped Cream

Next, whip the heavy cream in another bowl until stiff peaks form. Gently fold this whipped cream into the cream cheese mixture. This makes the filling light and airy.

Adding Mini Marshmallows and Chocolate Chips

Now, fold in the mini marshmallows and chocolate chips. These add fun bites of sweetness and flavor to your cheesecake.

Assembling the Cups

Layering the Cheesecake Mixture

After the crust has chilled, spoon the cheesecake mixture into each cup. Make sure each cup gets the same amount.

Ensuring Consistency and Smoothness

Use a spatula to smooth the top of each cup. This makes them look nice and ready to chill.

Chilling for Setting

Finally, place the cups back in the fridge. Let them set for at least 2 hours. This helps the flavors blend, making every bite delicious.

Tips & Tricks

Achieving the Perfect Texture

Cream Cheese Temperature: To get a smooth filling, your cream cheese should be at room temperature. This helps it mix well without lumps. If it’s cold, it won’t blend nicely.

Whipping Cream Tips: When whipping the cream, use a cold bowl and beaters. This helps create stiff peaks quickly. Don’t overmix; stop when it looks fluffy and thick.

Serving Suggestions

Garnishing Ideas: Top your cheesecake cups with toasted mini marshmallows and chocolate shavings. You can even drizzle some chocolate syrup for a fun look.

Pairing with Beverages: These cups go well with milk, hot cocoa, or even a light coffee. The flavors mix really well with warm drinks.

Common Mistakes to Avoid

Crust Too Crumbly: If your crust is too crumbly, add a bit more melted butter. This helps it hold together better.

Overmixing the Filling: Overmixing can make your filling too airy. Mix just until combined to keep it dense and creamy.

Variations

Flavor Variations

You can mix up the flavors of your No-Bake S’mores Cheesecake Cups for fun. Here are two ideas:

Dark Chocolate S’mores: Use dark chocolate chips instead of regular ones. This gives a rich, bold taste. You can also add a layer of dark chocolate ganache on top for extra depth.

Berry Swirl Cheesecake Cups: Add a berry puree, like raspberry or strawberry, to the cheesecake filling. Swirl it in gently for a beautiful look and a fruity twist.

Ingredient Substitutions

If you have dietary needs, you can still enjoy these cups. Here are some swaps:

Gluten-Free Version: Use gluten-free graham cracker crumbs. This keeps the same great taste without the gluten.

Vegan Alternatives: Substitute cream cheese with vegan cream cheese and use coconut whipped cream. You can also replace the butter with coconut oil.

Seasonal Twists

You can change the recipe to fit the seasons. Here are two fun ideas:

Pumpkin Spice S’mores Cups: Add pumpkin puree and pumpkin spice to the cheesecake filling. This gives it a warm, cozy flavor for fall.

Peppermint Cheesecake Cups: In winter, use peppermint extract in the filling. Top with crushed candy canes for a festive touch.

Storage Info

Best Practices for Storage

To keep your no-bake s’mores cheesecake cups fresh, store them in the fridge. Use an airtight container to prevent them from absorbing other odors. Make sure to keep them covered. If you want to freeze them, wrap each cup tightly in plastic wrap, then place them in a freezer-safe bag. This will help avoid freezer burn.

Shelf Life

In the fridge, these cheesecake cups will last for about 3 to 5 days. If you freeze them, they can stay good for up to a month. To check for spoilage, look for any changes in texture or smell. If they start to smell sour or have a watery layer, it’s best to toss them. Always trust your senses when it comes to food safety.

FAQs

Can I make this dessert in advance?

Yes, you can make these cheesecake cups ahead of time. They stay fresh for up to three days in the fridge. Just prepare the cups and let them chill. This saves time when you want to serve them. It also helps the flavors meld together nicely.

Can I use other types of cookies for the crust?

Absolutely! You can use any cookie you like. Some tasty options include Oreo cookies, gingersnaps, or even vanilla wafers. Each type will give a different flavor. Just crush them like you would graham crackers. Mix them with butter and sugar, and you’re good to go!

Is it necessary to toast the marshmallows before serving?

Toasting marshmallows is not necessary, but it adds a nice touch. The toasted flavor gives a great campfire vibe. If you want that classic s’mores taste, I recommend toasting them. You can use a kitchen torch or place them under a broiler for a minute. Just keep an eye on them so they don’t burn!

This blog post shared how to make delicious cheesecake cups. We discussed key ingredients, like graham crackers and sweeteners, to create a tasty crust. I guided you through step-by-step instructions for preparing the filling and assembling the cups. You also learned tips to achieve the perfect texture and common mistakes to avoid. Don’t forget the fun variations that add seasonal flair!

Try out these cheesecake cups for your next gathering or treat. Enjoy the sweet flavors and easy steps as you create your own tasty masterpiece.

- Grahams and More: Key Components - 1 cup graham cracker crumbs - 4 tablespoons unsalted butter, melted - 2 tablespoons granulated sugar The base of this dessert is made from graham cracker crumbs. The melted butter helps bind them together. The granulated sugar adds just the right amount of sweetness. - Sweeteners and Creaminess - 16 oz cream cheese, softened - ½ cup powdered sugar - 1 teaspoon vanilla extract - 1 cup heavy whipping cream Cream cheese gives the filling a rich texture. Powdered sugar sweetens it without grittiness. Vanilla extract adds a lovely aroma. Whipping cream makes the cheesecake light and fluffy. - Toppings and Garnishes - 1 cup mini marshmallows - ½ cup chocolate chips - Additional mini marshmallows and chocolate shavings for topping Mini marshmallows and chocolate chips mix into the filling for fun bites. You can top with toasted marshmallows and chocolate shavings for a beautiful finish. This adds extra flavor and makes the dessert look fancy. Mixing the Base Ingredients Start by mixing the graham cracker crumbs, melted butter, and granulated sugar in a bowl. Stir until the mix looks like wet sand. This mixture gives your crust a nice flavor and texture. Creating the Crust Layer Next, divide the crumb mixture into six cups. Press the crumbs down firmly to form a solid base. Make sure each cup has an even layer. Chilling the Crust Put the cups in the fridge for about 15 minutes. This helps the crust firm up before adding the filling. Beating the Cream Cheese In a separate bowl, beat the softened cream cheese until it’s smooth. This step is key for a creamy filling. Folding in Whipped Cream Next, whip the heavy cream in another bowl until stiff peaks form. Gently fold this whipped cream into the cream cheese mixture. This makes the filling light and airy. Adding Mini Marshmallows and Chocolate Chips Now, fold in the mini marshmallows and chocolate chips. These add fun bites of sweetness and flavor to your cheesecake. Layering the Cheesecake Mixture After the crust has chilled, spoon the cheesecake mixture into each cup. Make sure each cup gets the same amount. Ensuring Consistency and Smoothness Use a spatula to smooth the top of each cup. This makes them look nice and ready to chill. Chilling for Setting Finally, place the cups back in the fridge. Let them set for at least 2 hours. This helps the flavors blend, making every bite delicious. - Cream Cheese Temperature: To get a smooth filling, your cream cheese should be at room temperature. This helps it mix well without lumps. If it’s cold, it won’t blend nicely. - Whipping Cream Tips: When whipping the cream, use a cold bowl and beaters. This helps create stiff peaks quickly. Don't overmix; stop when it looks fluffy and thick. - Garnishing Ideas: Top your cheesecake cups with toasted mini marshmallows and chocolate shavings. You can even drizzle some chocolate syrup for a fun look. - Pairing with Beverages: These cups go well with milk, hot cocoa, or even a light coffee. The flavors mix really well with warm drinks. - Crust Too Crumbly: If your crust is too crumbly, add a bit more melted butter. This helps it hold together better. - Overmixing the Filling: Overmixing can make your filling too airy. Mix just until combined to keep it dense and creamy. {{image_2}} You can mix up the flavors of your No-Bake S’mores Cheesecake Cups for fun. Here are two ideas: - Dark Chocolate S’mores: Use dark chocolate chips instead of regular ones. This gives a rich, bold taste. You can also add a layer of dark chocolate ganache on top for extra depth. - Berry Swirl Cheesecake Cups: Add a berry puree, like raspberry or strawberry, to the cheesecake filling. Swirl it in gently for a beautiful look and a fruity twist. If you have dietary needs, you can still enjoy these cups. Here are some swaps: - Gluten-Free Version: Use gluten-free graham cracker crumbs. This keeps the same great taste without the gluten. - Vegan Alternatives: Substitute cream cheese with vegan cream cheese and use coconut whipped cream. You can also replace the butter with coconut oil. You can change the recipe to fit the seasons. Here are two fun ideas: - Pumpkin Spice S’mores Cups: Add pumpkin puree and pumpkin spice to the cheesecake filling. This gives it a warm, cozy flavor for fall. - Peppermint Cheesecake Cups: In winter, use peppermint extract in the filling. Top with crushed candy canes for a festive touch. To keep your no-bake s'mores cheesecake cups fresh, store them in the fridge. Use an airtight container to prevent them from absorbing other odors. Make sure to keep them covered. If you want to freeze them, wrap each cup tightly in plastic wrap, then place them in a freezer-safe bag. This will help avoid freezer burn. In the fridge, these cheesecake cups will last for about 3 to 5 days. If you freeze them, they can stay good for up to a month. To check for spoilage, look for any changes in texture or smell. If they start to smell sour or have a watery layer, it’s best to toss them. Always trust your senses when it comes to food safety. Yes, you can make these cheesecake cups ahead of time. They stay fresh for up to three days in the fridge. Just prepare the cups and let them chill. This saves time when you want to serve them. It also helps the flavors meld together nicely. Absolutely! You can use any cookie you like. Some tasty options include Oreo cookies, gingersnaps, or even vanilla wafers. Each type will give a different flavor. Just crush them like you would graham crackers. Mix them with butter and sugar, and you’re good to go! Toasting marshmallows is not necessary, but it adds a nice touch. The toasted flavor gives a great campfire vibe. If you want that classic s'mores taste, I recommend toasting them. You can use a kitchen torch or place them under a broiler for a minute. Just keep an eye on them so they don’t burn! This blog post shared how to make delicious cheesecake cups. We discussed key ingredients, like graham crackers and sweeteners, to create a tasty crust. I guided you through step-by-step instructions for preparing the filling and assembling the cups. You also learned tips to achieve the perfect texture and common mistakes to avoid. Don’t forget the fun variations that add seasonal flair! Try out these cheesecake cups for your next gathering or treat. Enjoy the sweet flavors and easy steps as you create your own tasty masterpiece.

No-Bake S’mores Cheesecake Cups

Indulge in the deliciousness of No-Bake S'mores Cheesecake Cups with this easy recipe! Perfect for any dessert lover, these delightful treats combine creamy cheesecake with crunchy graham cracker crust and gooey marshmallows. Make your next gathering sweet and memorable with this no-bake recipe that delivers tons of flavor in every bite. Click to explore the full recipe and impress your friends and family today! #NoBakeRecipes #CheesecakeLovers #S'mores #DessertIdeas

Ingredients
  

1 cup graham cracker crumbs

4 tablespoons unsalted butter, melted

2 tablespoons granulated sugar

16 oz cream cheese, softened

½ cup powdered sugar

1 teaspoon vanilla extract

1 cup heavy whipping cream

1 cup mini marshmallows

½ cup chocolate chips

Additional mini marshmallows and chocolate shavings for topping

Instructions
 

In a mixing bowl, combine the graham cracker crumbs, melted butter, and granulated sugar. Mix until the crumbs resemble wet sand.

    Divide the crumb mixture evenly among 6 serving cups, pressing down to form a firm base. Place the cups in the refrigerator to chill for about 15 minutes.

      In another large bowl, beat the softened cream cheese until smooth. Gradually add the powdered sugar and vanilla extract, mixing until well combined.

        In a separate mixing bowl, whip the heavy cream until stiff peaks form. Carefully fold the whipped cream into the cream cheese mixture until fully incorporated.

          Gently fold in the mini marshmallows and chocolate chips to the cheesecake mixture.

            Once the crust has chilled, spoon the cheesecake mixture evenly into each cup on top of the crust layer. Smooth the top with a spatula.

              Place the cups back in the refrigerator and let them set for at least 2 hours.

                Before serving, toast additional mini marshmallows if desired (use a kitchen torch for best results).

                  Garnish the cheesecake cups with toasted marshmallows and chocolate shavings before serving.

                    Prep Time: 20 minutes | Total Time: 2 hours 20 minutes | Servings: 6

                      WANT TO SAVE THIS RECIPE?

                      Leave a Comment

                      Recipe Rating