
Latest & Greatest
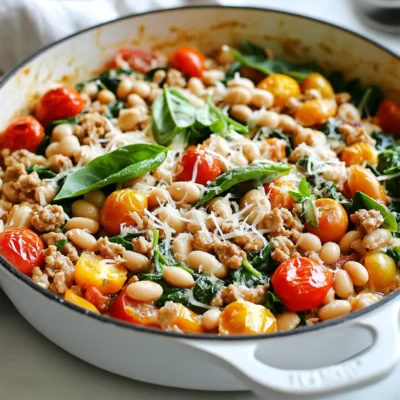
Tuscan White Bean Turkey Skillet Flavorful Dinner Delight
Are you ready to make dinner exciting? The Tuscan White Bean Turkey Skillet is packed with flavor and nutrition. This
Read more…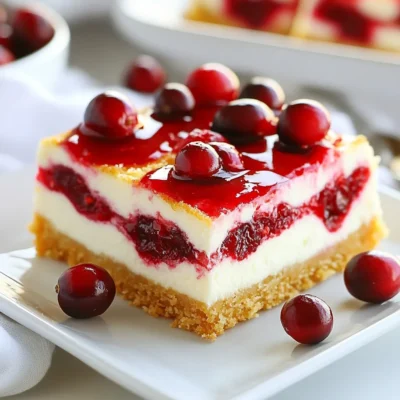
Cranberry Cheesecake Bars Delightful Holiday Treat
Looking for a festive dessert that will impress your guests? These Cranberry Cheesecake Bars bring a perfect blend of tart
Read more…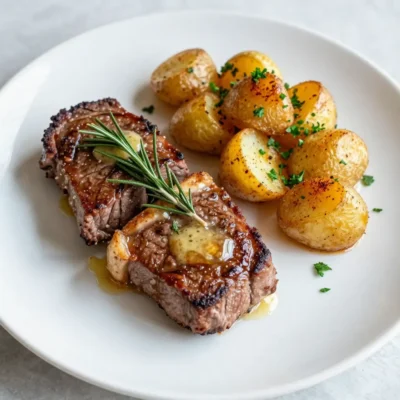
Garlic Butter Steak Bites with Potatoes Delight
Do you crave a dish that’s both savory and simple? Look no further than my Garlic Butter Steak Bites with
Read more…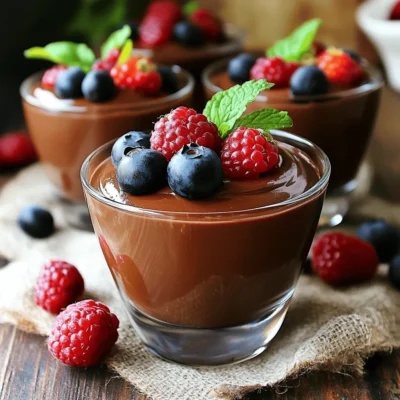
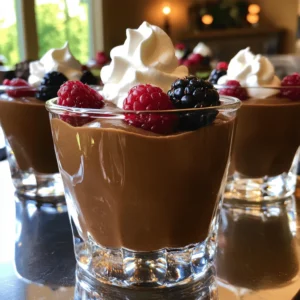
Vegan Chocolate Mousse Smooth and Rich Delight
If you crave a rich dessert without the guilt, this Vegan Chocolate Mousse is for you! I’ll show you how
Read more…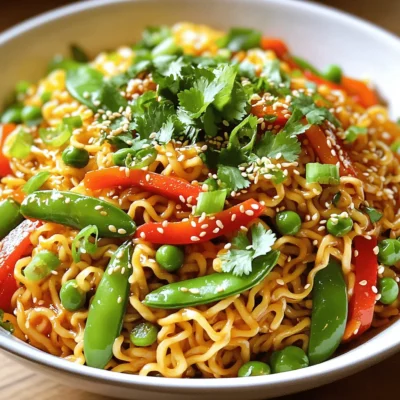
Spicy Sesame Ramen Stir-Up Quick and Flavorful Meal
Looking for a quick meal packed with flavor? This Spicy Sesame Ramen Stir-Up is the answer! In just a few
Read more…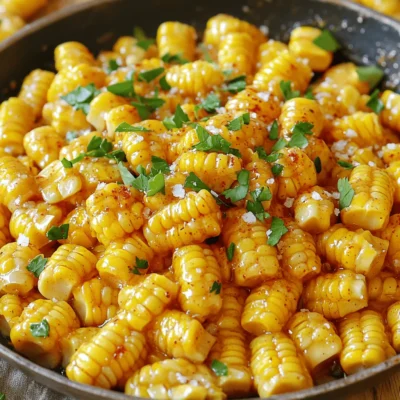
Honey Butter Skillet Corn Flavorful and Easy Recipe
Are you ready to elevate your side dish game? Honey Butter Skillet Corn is simple, sweet, and bursting with flavor!
Read more…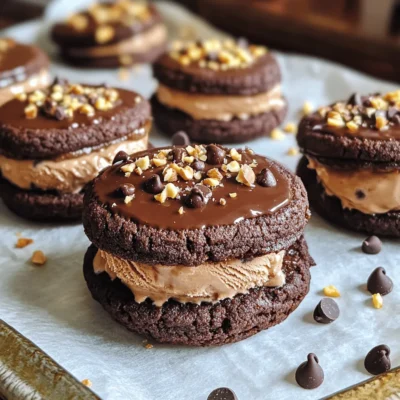
Mocha Chip Ice Cream Sandwiches for Your Delightful Treat
Craving a sweet treat that combines rich mocha flavor and creamy ice cream? You’re in for a delight with mocha
Read more…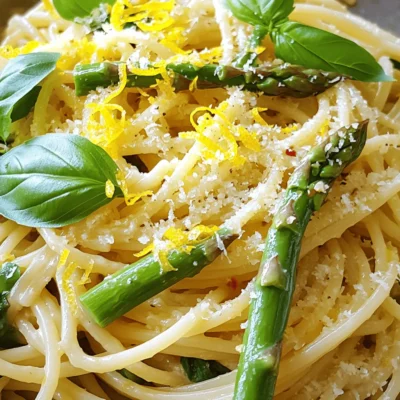
Lemon Garlic Asparagus Pasta Tasty and Healthy Dish
Craving a dish that’s both tasty and healthy? Look no further! Lemon Garlic Asparagus Pasta combines fresh flavors with simple
Read more…browse recipes

![To make the Decadent Ultimate Fudgy Brownies, you need a few key ingredients. Each one plays a vital role in creating that rich, fudgy texture. Here’s what you will need: - 1 cup unsalted butter (2 sticks) - 2 cups granulated sugar - 4 large eggs - 1 teaspoon vanilla extract - 1 cup all-purpose flour - 1 cup unsweetened cocoa powder - 1 teaspoon baking powder - 1/2 teaspoon salt - 1 cup chocolate chips (milk or dark based on preference) - 1/2 cup chopped walnuts or pecans (optional) These ingredients blend together to create a deep chocolate flavor. Butter adds richness while sugar gives sweetness. Eggs bind everything, making your brownies soft. Vanilla extract adds a lovely aroma. Flour provides structure, and cocoa gives that intense chocolate taste. Baking powder helps the brownies rise just a bit. Salt enhances all these flavors. When picking chocolate chips, think about your taste. Milk chocolate brings a sweet touch. Dark chocolate adds a more intense flavor. If you like nuts, add walnuts or pecans for crunch. Using fresh ingredients ensures the best taste. I recommend measuring everything before you start. This will help you feel ready and organized. For the full recipe, check out the detailed instructions to create these delightful brownies. - Preheat the oven to 350°F (175°C). - Grease a 9x13 inch baking pan with butter or line it with parchment paper. - Melt 1 cup of unsalted butter in a medium saucepan over low heat. - Once melted, stir in 2 cups of granulated sugar until smooth. - Remove from heat and let it cool for a minute. - Add 4 large eggs one at a time, mixing well after each egg. - Stir in 1 teaspoon of vanilla extract until blended. - In a separate bowl, sift together 1 cup of all-purpose flour, 1 cup of cocoa powder, 1 teaspoon of baking powder, and 1/2 teaspoon of salt. - Gradually fold the dry mix into the wet mixture until just combined. - Be careful not to overmix. - Gently fold in 1 cup of chocolate chips and 1/2 cup of chopped nuts if you like. - Pour the batter into the prepared pan and spread it evenly. - Bake for 25-30 minutes. Check with a toothpick; it should come out with a few moist crumbs. - Let the brownies cool in the pan for at least 10 minutes. - Transfer to a wire rack to cool completely. For the full recipe, check the sections above. Enjoy your delicious brownies! To make the best fudgy brownies, focus on key ingredients. The unsalted butter gives richness, while granulated sugar adds sweetness. Eggs provide moisture and help bind. Flour and cocoa powder create the brownie structure. Do not overmix the batter. Mix until just combined. Overmixing adds air and makes brownies cakey. To prevent overbaking, set a timer for 25 minutes. Check with a toothpick. It should come out with a few moist crumbs. If it comes out clean, the brownies may be dry. Let the brownies cool in the pan for ten minutes. Afterward, transfer them to a wire rack. This helps keep them moist and fudgy. For a great presentation, cut brownies into even squares. Serve warm with a scoop of ice cream on top. Drizzle with chocolate sauce for extra flavor. You can also add whipped cream or a sprinkle of sea salt. Pair your brownies with coffee or a glass of milk for a delightful treat. For a fun twist, try serving with fresh berries or a berry sauce. For the full recipe, check out the Ultimate Fudgy Brownies section. {{image_2}} You can switch up the chocolate in your brownies. Use dark chocolate for a rich taste. White chocolate adds a sweet twist. You can also try flavored extracts. Almond or mint extract can make your brownies unique. Just add a teaspoon to the batter for extra flavor. Mix-ins can change the brownies' taste and texture. Try adding peanut butter for a nutty flavor. Swirl in caramel for a sweet surprise. If you need gluten-free brownies, swap all-purpose flour with a gluten-free blend. This keeps the taste rich and fudgy. A simple ganache can make your brownies even more indulgent. Melt chocolate with cream to drizzle over the top. For a lighter touch, dust with powdered sugar. This adds a nice finish and makes the brownies pretty. You can find the full recipe [Full Recipe]. To keep your brownies fresh, store them in an airtight container. This method prevents them from drying out. You can also wrap them tightly in plastic wrap. Keep them at room temperature for up to four days. If you want to store them longer, refrigerate for up to a week. Always let them cool completely before storing. Freezing brownies is a great option for later treats. Start by cutting the brownies into squares. Place each square on a baking sheet lined with parchment paper. Freeze them for about an hour. Once frozen, transfer them to a freezer-safe bag or container. They can last up to three months in the freezer. When you're ready to enjoy, move them to the fridge overnight to thaw. For a warm, fudgy experience, reheat brownies in the oven. Preheat your oven to 350°F (175°C). Place the brownies on a baking sheet. Heat for about 10 minutes. You can also microwave them for 10-15 seconds. This method makes them gooey and delightful. Enjoy your decadent ultimate fudgy brownies! If you're looking for the full recipe, check it out! What makes brownies fudgy vs cakey? Fudgy brownies have more fat and less flour than cakey ones. The high butter and sugar ratio gives them a soft, gooey texture. Cakey brownies use more flour and baking powder, making them lighter and fluffier. I prefer fudgy brownies because they feel rich and melt in your mouth. Can I reduce sugar in this recipe? Yes, you can reduce the sugar by up to 1/2 cup. This change may alter the taste and texture slightly. If you reduce sugar, the brownies may be less sweet but still delicious. You can also try using a natural sweetener like honey or maple syrup for a different flavor. Why are my brownies too dry? Brownies can dry out for a few reasons. Overbaking is the most common cause. Check your brownies a few minutes before the time is up. If a toothpick comes out clean, they are done. Also, make sure you measure your ingredients accurately. Too much flour can lead to dryness. What causes cracks on the top of brownies? Cracks often happen when the batter bakes too fast. This can be due to high oven temperature or overmixing the batter. To avoid cracks, ensure your oven is at the right temperature. Mix the batter until just combined to keep it moist. Tips for adding spices or additional flavors You can make brownies even better by adding spices. A pinch of espresso powder boosts the chocolate flavor. Cinnamon or nutmeg adds warmth and depth. You can also add a splash of almond extract for a nutty twist. Suggestions for flavor pairings with brownies Brownies pair well with many flavors. Try serving them with vanilla ice cream for a classic treat. Berries like raspberries or strawberries add a fresh touch. A drizzle of caramel or chocolate sauce can take them to the next level. For a crunchy bite, sprinkle some sea salt on top. Check out the Full Recipe for more tips on serving. This blog post covered everything you need for the ultimate fudgy brownies. We went over the ingredients, step-by-step instructions, and important tips for a perfect bake. You learned about fun variations and how to store or freeze your brownies to keep them fresh. Understanding these details helps you create delicious treats every time. Whether you enjoy them plain or with toppings, these brownies will surely please. Get ready to impress friends and family with your baking skills!](https://emmasdish.com/wp-content/uploads/2025/06/0df86677-361d-4dfc-89fb-f08daaeec0f4.webp)
Decadent Ultimate Fudgy Brownies Simple Delight
Are you ready to indulge in the ultimate chocolate experience? These Decadent Ultimate Fudgy Brownies are rich, gooey, and oh-so-simple to make! With just…
My Latest Desserts
My Latest Recipes

hey,
i’m !
I’m so happy you’re here!
I’m not just sharing recipes I’m sharing a piece of my heart. I hope these dishes bring you comfort, joy, and maybe even a new favorite.
![- 1 cup jasmine rice - 1 can (400 ml) coconut milk - 1 cup water - Zest of 1 lime - 2 tablespoons fresh lime juice - 1 tablespoon sugar (optional) - 1/2 teaspoon salt - Fresh cilantro, chopped (for garnish) - Lime wedges (for serving) To make Coconut Lime Rice, you need simple ingredients. The jasmine rice gives a nice, soft texture. The coconut milk adds a rich creaminess that pairs well with lime. You can swap jasmine rice for basmati or brown rice. These choices offer different flavors and textures. If you want to make this dish vegan, look for coconut milk made from plants. For lime juice, fresh is best, but bottled works too. Just remember that fresh lime juice has a brighter taste. These substitutions can help you customize your Coconut Lime Rice. You can enjoy this dish no matter your diet or taste. If you want to explore more, check out the Full Recipe for detailed steps and flavors. 1. Start by rinsing the jasmine rice. Place it in a fine-mesh strainer. Rinse it under cold water until the water runs clear. This takes about 2-3 minutes. Rinsing helps remove excess starch. This keeps the rice from becoming too sticky. 2. Next, combine the cooking ingredients. In a medium saucepan, add the rinsed rice. Pour in the can of coconut milk and 1 cup of water. Then, add the lime zest, salt, and sugar if you want it sweeter. Stir everything well to mix. 1. Now, it’s time to boil the mixture. Place the saucepan on the stove over medium-high heat. Bring the mixture to a boil. Keep an eye on it so it doesn’t boil over. 2. Once it boils, reduce the heat to low. Cover the saucepan tightly with a lid. Let it simmer for 15-20 minutes. This helps the rice absorb all the flavors and liquid. Check to see if the rice is tender and the liquid is gone. 1. After cooking, turn off the heat. Let the rice sit covered for an extra 5 minutes. This step steams the rice and makes it fluffy. 2. Fluff the rice with a fork. Then, mix in the fresh lime juice. Taste it and adjust the seasoning if needed. 3. Serve the warm rice on a plate. Garnish with chopped cilantro and add lime wedges on the side. This adds a fresh, zesty burst of flavor to your dish. For the full recipe, you can refer back to the details above. Enjoy your cooking! - Overcooking the rice: This can lead to mushy rice. Keep an eye on the cooking time. Use a timer to help you. - Incorrect liquid ratios: Use the right amounts of coconut milk and water. Too much liquid makes the rice soggy. - Adding spices or herbs: Try mixing in some cumin or coriander for a warm note. Fresh herbs like mint or basil can add a nice twist. - Adjusting sweetness levels: If you love sweet, add a bit more sugar. For a zesty kick, add extra lime juice. - Best pairings with Coconut Lime Rice: This rice pairs well with grilled chicken, shrimp, or fish. It also goes great with stir-fried vegetables. - Presentation tips for a beautiful dish: Serve the rice in a bowl and top with fresh cilantro. Add lime wedges on the side for a pop of color. For a fun look, use a ring mold to shape the rice. Check out the Full Recipe for all the details you need to make this tasty side dish! {{image_2}} You can make Coconut Lime Rice even more fun by adding tropical fruits. Pineapple chunks or mango pieces bring a sweet burst of flavor. Just toss in the fruit when you fluff the rice. You can also add nuts and seeds for a crunchy texture. Try toasted coconut flakes or slivered almonds. These additions make the dish fresh and exciting. If you follow a gluten-free diet, this rice works perfectly. All the ingredients are gluten-free, so enjoy without worry. For those on low-carb diets, consider using cauliflower rice instead of jasmine rice. It absorbs flavors well and gives you that coconut and lime taste without the carbs. Want to take your Coconut Lime Rice on a world tour? Try incorporating Asian flavors like ginger or garlic. A splash of soy sauce can add depth. For a Latin twist, mix in black beans or corn for a colorful, hearty dish. You can also serve it with spicy salsa for a fun fusion. This rice pairs with many cuisines, making it versatile for any meal. For the full recipe, check out the [Full Recipe] above! After you make Coconut Lime Rice, let it cool first. Once cooled, put it in an airtight container. This helps keep it fresh. Store it in the fridge for up to four days. Make sure to cover it well to avoid drying out. If you want to enjoy it later, take it out and reheat it gently. You can freeze Coconut Lime Rice for longer storage. Place the cooled rice in freezer-safe bags or containers. Try to remove as much air as you can. Label the bags with the date. The rice can last up to three months in the freezer. When you want to eat it, pull it out and let it thaw in the fridge overnight. To reheat, place it in a microwave-safe dish. Add a splash of water to keep it moist. Microwave on low heat, stirring often. You can also warm it up on the stove with a little water. This keeps the rice fluffy and tasty. For the full recipe, check out the earlier section! Coconut lime rice is a flavorful side dish made with jasmine rice, coconut milk, and lime. This dish comes from various tropical regions, where coconut and lime grow abundantly. It brings a bright and zesty flavor to any meal. The creamy coconut milk pairs perfectly with the tangy lime, making it a favorite at many tables. You can serve it with grilled seafood, spicy dishes, or fresh salads. Yes, you can make coconut lime rice ahead. It stores well and reheats nicely. To prep, cook the rice as directed in the Full Recipe. Let it cool completely before placing it in an airtight container. Store it in the fridge for up to three days. If you want to keep it longer, you can freeze it for up to a month. When ready to eat, just reheat it in a microwave or on the stove with a splash of water to bring back its moisture. To achieve a creamy texture, use full-fat coconut milk. This gives the rice a rich taste. Rinse the rice well before cooking to remove excess starch. This step prevents the rice from becoming too sticky. If you want it even creamier, add a bit more coconut milk during cooking. Once cooked, fluff it gently with a fork and mix in the lime juice. This adds brightness and helps create a silky consistency. Coconut lime rice pairs well with many dishes. Try serving it with grilled shrimp or chicken for a tasty main course. It also goes great with spicy curries or stews. For a lighter meal, serve it with a fresh salad or grilled vegetables. You can even use it as a base for a rice bowl topped with your favorite proteins and veggies. The options are endless! Coconut Lime Rice is a simple yet tasty dish. You learned about the key ingredients, cooking steps, and common mistakes. We explored fun ways to change the recipe, like adding fruits or different spices. Proper storage tips help keep your rice fresh. This dish shines as a side or main. Enjoy your cooking journey, and don't hesitate to experiment with flavors.](https://emmasdish.com/wp-content/uploads/2025/06/02837926-9ed0-4c4d-b9a3-92a87b00b2a1-300x300.webp)

![- 1 cup rolled oats - 2 ripe bananas, mashed - 1 cup almond milk (or other milk) - 1 teaspoon baking powder - 1 teaspoon vanilla extract - 1 tablespoon honey or maple syrup (optional) - 1/2 teaspoon cinnamon - Pinch of salt - Coconut oil or cooking spray for the pan To make healthy banana oat pancakes, you need simple and natural ingredients. First, I use rolled oats. They add fiber and keep you full. Next, I choose ripe bananas. Ripe bananas give natural sweetness. They also add moisture to the pancakes. Almond milk is my go-to. You can use any milk you like. For extra fluffiness, I add baking powder. Vanilla extract makes the pancakes taste great. If you like more sweetness, honey or maple syrup works well. Cinnamon adds a warm flavor, and a pinch of salt balances everything. Finally, I use coconut oil to grease the pan. It gives a nice flavor and prevents sticking. You can find the full recipe to make your pancakes easy and delicious. To start, you need to make oat flour. Take 1 cup of rolled oats. Place them in your blender or food processor. Pulse the oats until they turn into a fine flour. This step is quick and easy. Oat flour gives your pancakes a nice texture. Next, let’s mix the batter. Grab your mashed bananas, almond milk, baking powder, vanilla extract, honey, cinnamon, and a pinch of salt. Combine all these ingredients in the blender with the oat flour. Blend until the mixture is smooth. This batter should be creamy and thick. Let it sit for 5-10 minutes. This resting time helps it thicken even more. Now, it's time to cook! Heat a non-stick skillet over medium heat. Lightly grease the pan with coconut oil or cooking spray. Pour about 1/4 cup of batter onto the skillet for each pancake. Cook until you see bubbles on the surface. This usually takes around 2-3 minutes. When the edges look dry, carefully flip the pancakes. Cook for another 2-3 minutes until they are golden brown. Repeat until all the batter is used. Enjoy your delicious pancakes! For the full recipe, check out the earlier section. To make your pancakes fluffy and delicious, let the batter rest for 5-10 minutes. This helps it thicken and improves the texture. While the batter rests, heat a non-stick skillet over medium heat. Make sure to lightly grease it with coconut oil or cooking spray. This will keep your pancakes from sticking and allow for even cooking. Stack your pancakes high on a plate for a great look. Top them with fresh banana slices and a drizzle of honey or maple syrup. Add some nuts or seeds for a fun crunch. For extra creaminess, serve with Greek yogurt on the side. This not only looks good but also makes your meal more filling and nutritious. For the full recipe, check out the [Full Recipe]. {{image_2}} You can easily adjust this recipe to fit your diet. If you need a gluten-free option, choose gluten-free oats. This simple swap makes the pancakes safe for those with gluten intolerance. For a lactose-free choice, substitute almond milk for regular milk. Almond milk works perfectly and keeps the pancakes soft and moist. Want to mix things up? You can add chocolate chips or chopped nuts to the batter. This gives each bite a delightful crunch. If you like warm spices, try adding a dash of nutmeg or a bit of vanilla bean. These flavors will elevate your pancakes and make them even more tasty. Enjoy experimenting with your favorite flavors! If you have leftover pancakes, store them in an airtight container in the refrigerator. This keeps them fresh for a few days. Remember to let them cool before sealing. This helps prevent condensation, which can make them soggy. When you’re ready to enjoy your pancakes again, reheat them in a toaster or skillet. This method gives them the best texture, making them fluffy and warm. You can also microwave them for a quick option, but they may not be as crispy. If you use the microwave, heat them in short bursts to avoid drying them out. You can make these pancakes vegan by swapping honey for maple syrup. Use plant-based milk, like almond or oat milk. This keeps the pancakes tasty and friendly for a vegan diet. Yes, you can freeze these pancakes. Place parchment paper between each pancake to keep them separate. Store them in an airtight container or a freezer bag. They will stay fresh for about a month. If you don’t have bananas, try using applesauce or mashed sweet potatoes. These options give a similar texture and sweetness. You can enjoy pancakes even without bananas! For the full recipe, check out the detailed instructions above. These banana oat pancakes are simple and tasty. We covered the main and extra ingredients, step-by-step instructions, and helpful tips. You can customize them to fit your diet and enjoy them fresh or reheated. Remember, you can even freeze leftovers for later. Give these pancakes a try for a healthy breakfast that fills you up. It's easy to make them your own, so get creative! Enjoy your cooking and happy eating!](https://emmasdish.com/wp-content/uploads/2025/07/586e6978-884d-467f-992a-f783d71f0243-300x300.webp)
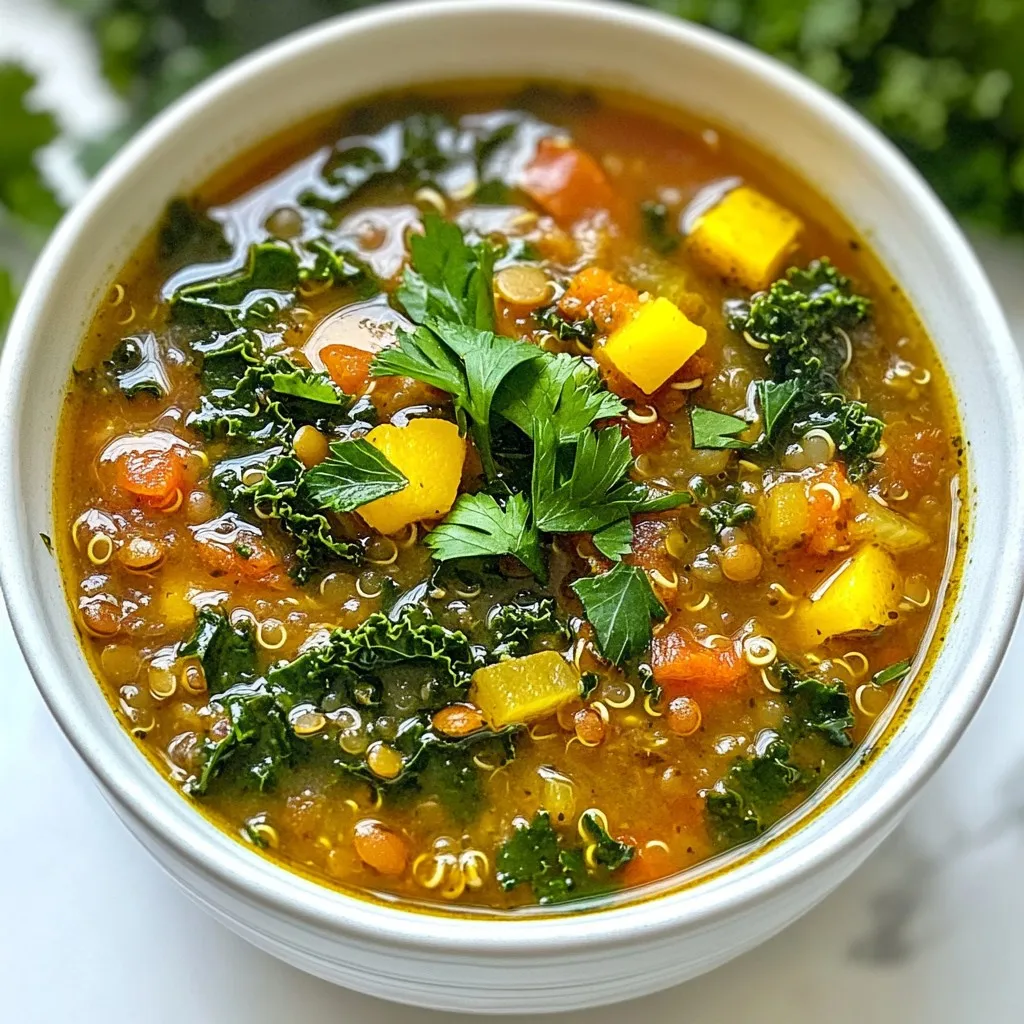
High-Protein Fall Soups Simple and Hearty Recipes
As the leaves turn and the air cools, nothing warms you up like a hearty soup. In this post, I’ll share simple and delicious…