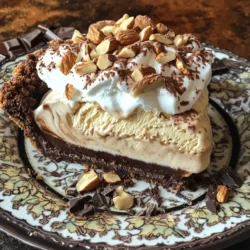
Coffee Crumble Ice Cream Pie
Indulge in a delightful Coffee Crumble Ice Cream Pie that combines rich coffee flavors with a crunchy chocolate crust. This no-bake dessert is perfect for warm days and easy to make with just a few simple ingredients. Discover the step-by-step process and impress your family and friends with this creamy treat. Click to explore the full recipe and elevate your dessert game today!